Disclosure: This content is reader-supported, which means if you click on some of our links that we may earn a commission.
Do you want to skip the read and get right to my top picks? The best cheap web hosting service for most people is Hostinger or DreamHost.
There’s no need to pay a fortune for web hosting if you’re launching a new website. A cheap web hosting solutions will work just fine.
But how cheap is too cheap? There are a lot of attractive options out there. Separating the good deals from the scams is important.
Fortunately, you won’t actually have to search through all of them. There are really only one or two dozen reputable web hosts to consider.
That list gets even smaller if you’re looking for a cheap web hosting plan that actually delivers good service.
If you want to get your site online for as little as possible, these are my top picks:
#1 – Hostinger Review — The Best Web Hosting Plan Under $1
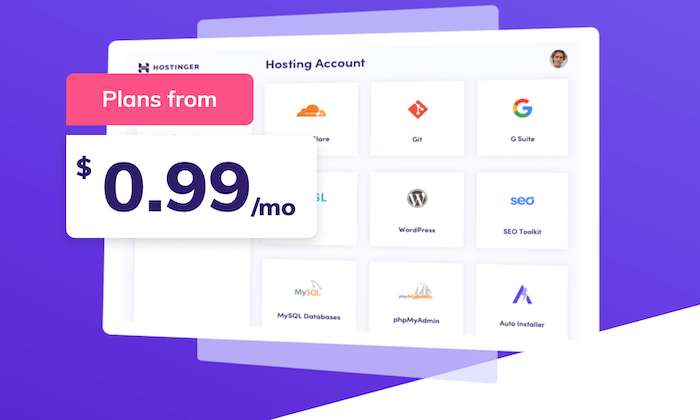
Hostinger has the absolute cheapest price for hosting at $0.99 cents per month for the Single Shared Hosting plan. So what’s the catch?
You have to sign up for a 48-month contract, which sounds a little heavy. But, bear with me.
Four years of Single Shared is going to cost less than a single year of hosting through other providers.
Seriously, other low-budget hosting plans are still twice to four times as expensive. Plus, the introductory rates you get with competitors might skyrocket when you have to renew. Once the honeymoon period is over, you might be looking at $10 or more each month.
With Hostinger on the other hand, your rate for shared hosting goes from $0.99 cents to $2.99/month upon renewal. That’s still a great price.
In other words, the Hostinger full rate is still less than introductory rates from other good cheap hosting options.
Okay, great. But I know you’re thinking the low rate must mean that there are annoying domain limits and few free tools to build your business.
Untrue. Hostinger is loaded to the brim with features and function.
Hostinger’s Single Shared Hosting plan supports one site, and includes:
100 GB bandwidth30 GB storage1 email accountFree SSL certificate99.9% uptime guarantee24/7/365 customer supportOptimized for WordPress with one-click installationUser-friendly control panelCloudflare protected nameservers
There’s no free domain name included, which isn’t a big deal if you already have one. Bluehost and DreamHost come with a free domain name for the first year, but higher per-month rates.
If you need a free domain name, more storage, or unlimited bandwidth, Hostinger lets you upgrade your plan while keeping costs low:
Say you need to move to Premium Shared Hosting to support another site. That will cost $1.99/month to start and $4.99/month when you renew. That’s not going to break the bank, and you can host up to 100 websites.
Hostinger does a lot to ensure that the service is easy to use. Set up takes minutes and absolutely zero technical skill.
If you ever have issues, Hostinger’s customer service is always available and has a phenomenal reputation. The company gets you in the door with budget-friendly prices, and keeps you around with quality support.
Choose Hostinger for the lowest per-month plan on the market. Try it today risk-free, as Hostinger will refund your purchase if you aren’t happy within the first 30 days.
#2 – DreamHost Review — The Lowest Spend on Day One
Not everyone wants to sign a long contract for hosting, but you usually have to in order to get the lowest price. Typically, you have to pay the whole amount upfront, which can get expensive even when you are looking at cheap plans.
DreamHost offers similar discounts if you want to sign a contract, but if you don’t, DreamHost’s month-to-month pricing is the lowest out there.
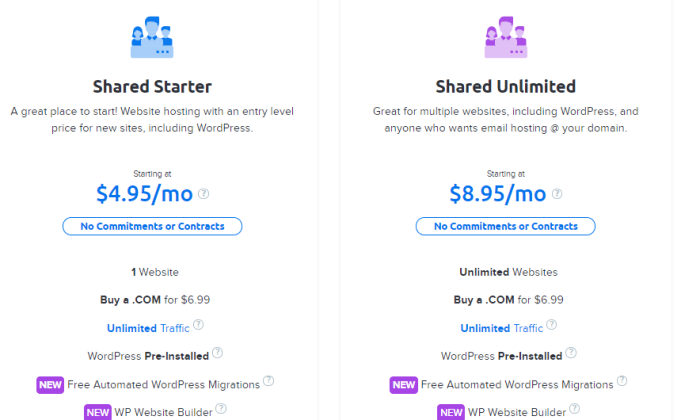
DreamHost Shared Starter is $4.95/month for one site. No contract necessary.
There’s really no way to get a lower price without a commitment. This can be really important for cash-strapped startups betting on growth. Instead of a big upfront spend, they can budget a predictable monthly hosting cost into the equation.
Freedom isn’t free, they say, and it’s especially true with hosting. Many young companies have found themselves locked into a long contract with no way out. Now they’re spending money on a service they don’t like at a time when every dollar counts.
With DreamHost, you can still get cheap hosting, but you don’t have any of the long-term risk that comes with a multi-year contract.
When you look at the month-to-month pricing for other plans on this list, there is no competition. A2 Hosting is $10.99/month, Hostgator is $10.95/month, and Hostinger is $9.99 with a $4.99 set up fee.
Bluehost and iPage don’t even offer plans without at least a year-long commitment.
All of these other plans are great, don’t get me wrong, but if you are looking for a no-contract option, DreamHost is the clear leader. Especially because you get such a solid range of features and free tools to build your site:
Unlimited traffic50 GB storageFree SSL certificateFree WordPress website builderFree automated WordPress migrationsAutomated WordPress updates24/7 live chat and ticket support
Like Bluehost, DreamHost is officially recommended by WordPress. The integration is deep and all of the updates are handled automatically. This is good for security purposes and saves you the trouble of doing it yourself.
So you can get all the benefits of tight WordPress integration without the commitment and large down payment required by Bluehost.
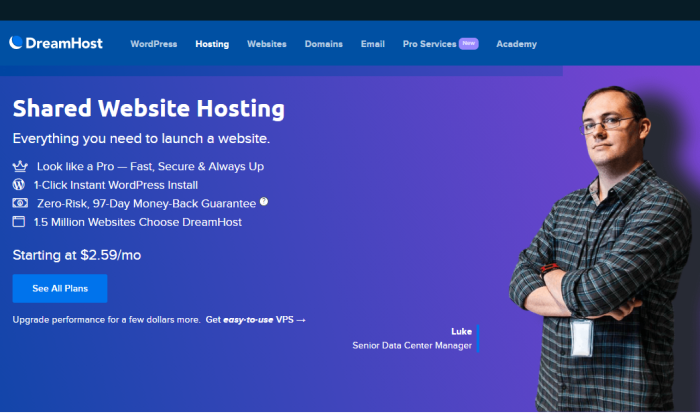
Now you might think that no contract would mean no money-back guarantee. The truth is DreamHost has a zero-risk 97-day money-back guarantee. That’s the longest time to try a web host that I know of.
If you need more than one site, and you want to pay month-to-month, iPage can’t help you. DreamHost offers a Shared Unlimited plan for $8.95/month that works for an unlimited number of sites:
If you just have one site, Shared Starter is all you need.
Stop worrying about when the honeymoon period of your introductory pricing is going to end.
Get DreamHost and pay a low, predictable rate each month. No more contracts, no more inflexible commitments. Just reliable hosting at a consistent price.
#3 – Bluehost Review — The Best for New Sites (Especially WordPress)
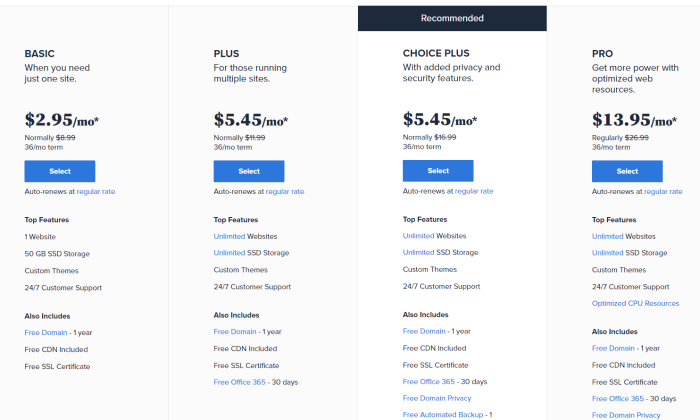
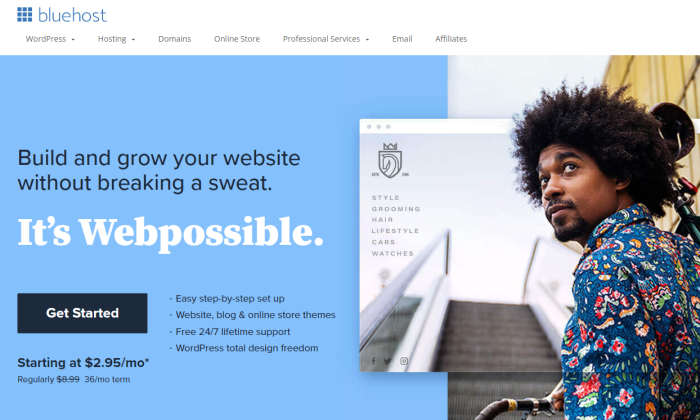
There’s probably no easier way to get your new website off the ground than with Bluehost. And it won’t cost you much at all, as the company offers incredibly feature-rich shared hosting starting at $2.95/month.
For most people with a new site—especially if it is their first site—Bluehost is what they want.
If you are building a WordPress site, I really recommend checking out your options at Bluehost. The company is one of only three hosting providers that is officially recommended by WordPress. The integration is amazing and installation is automatic.
We’ll talk more about why it’s so good for WordPress in a second, but I want to talk about why it’s good for just about anyone with a new site.
First off, Bluehost has some of the cheapest hosting rates around. And even the most basic plans are loaded with features and value.
You get a free domain name for the first year. Not only do you get to skip that expense, but the convenience of registering your domain through Bluehost cuts down on the time it takes to go live.
If this is your first site ever, you will be grateful at how simple the process is. If you’ve built sites before, you will really appreciate everything that’s done for you.
For example, you get a free SSL certificate for your site,and enabling it takes one click on the dashboard. This is critical for keeping all of the information on your site secure and lets visitors know that the site is safe to visit.
You can get free SSL certificates from other places, but they will not be this easy to install, trust me. And you will have to renew them every couple months.
With Bluehost, it’s completely hands-off and you are always protected.
You also get a free content delivery network (CDN) through Bluehost’s partnership with Cloudflare. This is going to improve site speed and performance with near-zero work on your part.
Okay, so on top of the free domain name, SSL certificate, and CDN, Bluehost gives you:
50 GB storageUnmetered bandwidth24/7 customer support via phone and live chat$100 Google Ads creditsAutomatic WordPress installations and updatesCustom WordPress themes30-day full refund if you aren’t satisfied
All of these features are included with the Bluehost Basic shared hosting, which starts at $2.95/month. If you have to upgrade, prices stay affordable at the higher tiers:
One thing to be aware of is that Bluehost renewal rates are about two to three times higher than the introductory rate. This is why I recommend signing up for a long plan to max out the discount period.
Even at full price, though, Bluehost is really competitively priced compared to the field. This is especially true when you consider the long list of features you get and the ease of getting set up.
It’s as hands-free of a hosting experience as you could ask for and when you want to develop your site, all the tools are right there.
WordPress is automatically installed on Bluehost, for example. This means full integration and automatic WordPress updates.
With Bluehost shared hosting, you can use another content management system (CMS) besides WordPress if you want.
But if you know that you are only going to use WordPress, I highly recommend going with one of Bluehost’s WordPress Shared Hosting plans.
These start at $2.95/month, which is the same price as regular shared hosting. The difference is that the servers that have been optimized exclusively for WordPress. There’s no other type of software on them, so servers can be better configured and more easily protected.
If you have a new site in mind, make Bluehost your one-stop-shop for getting online. Get everything set up in a single place instead of having to go through a domain registrar. Best of all, you’ll get a great deal in the process.
So if you have a new site: Get Bluehost Basic shared hosting.
And if that new site is a WordPress site: Get Bluehost Basic WordPress hosting.
There’s a reason that more than 2 million sites are hosted through Bluehost. Find out why today.
#4 – A2 Hosting Review — The Best Web Hosting Under $3 for Online Stores
If you grow your ecommerce site past a certain point, the cheapest web hosting options won’t work. But, if you are just getting your online store up and running, there is no better budget-friendly option than A2 Hosting.
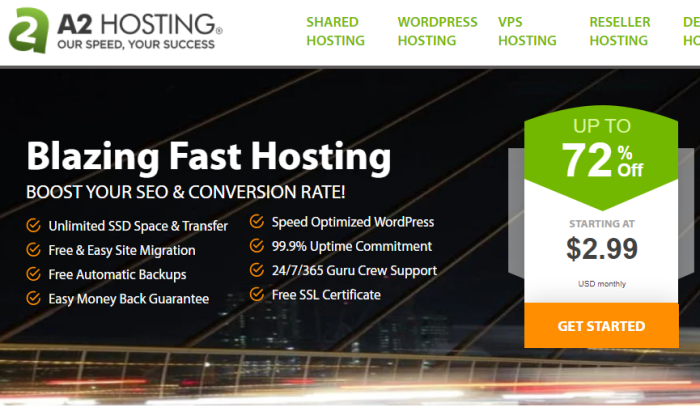
In fact, you can get everything you need to launch for $2.99/month with the A2 Startup plan. You’ll have to sign a contract to get the lowest rate, but you’ll be ready to go within minutes.
Along with PayPal integration, the cheapest A2 hosting plan comes with one-click installs for five of the top ecommerce platforms, including WooCommerce, OpenCart, and Magneto. There’s hardly any backend IT work to start selling.
A2 Hosting offers some of the best site speed and security for the price, which are really important for online stores.
Shoppers won’t stay if your content is slow to load. A2 takes care of all the technical legwork that goes into maintaining high performance servers. It’s compatible with Cloudflare’s free content delivery network, which can boost your speed as well.
Most shoppers won’t even come if Google says your site’s not safe. That’s going to happen if you don’t have an SSL certificate. A2 includes one for free, and it’s always enabled.
This is a huge perk, because you can get free SSL certificates elsewhere, but it’s on you to configure and renew them, which can be frustrating.
Most of the other security benefits are similarly hands off. The virus scanner, firewall, and brute force defense are on autopilot—you’ll receive notification if there’s something you need to do, but A2 handles a lot on its own.
And if you have an issue you can’t solve, A2 will help. Go read reviews. The company has some of the happiest web hosting customers on the planet. If you need to move your old site to A2’s servers, they have a team that will do it for free.
Some of the other excellent benefits of A2 Startup include:
100 GB storageUnlimited bandwidthUnlimited email addresses24/7/365 customer support via phone, live chat, email, and ticketing 99.9% uptime commitmentOptimized WordPress hostingDNS management toolsWebsite staging
Website staging is really useful for online stores. You can test new features and buttons on a page in a development area before pushing it live. This way you can see if anything breaks before it impacts your customers.
The A2 Startup plan is aptly named—it won’t be enough once your site matures. But by the time you’ve hit that milestone, your site will be bringing in more than enough money to justify the cost of upgrading.
A2 is one of the pricier options on my list of cheap web hosting providers. I like it for online stores because of the speed, security, and generous limits on storage. 100 GB is twice as much as you get with Bluehost.
And if you aren’t happy with your service, A2 Hosting will refund your account within 30 days of purchase. It’s a true hassle-free money-back guarantee.
Your online reputation matters, so it’s a huge peace of mind to know that customer service is always there. A2 Hosting representatives are extremely knowledgeable. They will help you resolve issues quickly, before your online store takes a hit.
#5 – HostGator Review — The Best Way to Host Your Existing Site for Cheaper
When your current host jacks up the rates or takes a customer service nose-dive, you need to switch. Whatever the cause, there is no reason to pay for substandard hosting.
Hostgator will help you migrate your old site for free. This includes the cPanel, email accounts, files, databases, scripts, etc. They also include one free domain registration transfer, which saves a few bucks, too.
All you have to do is fill out a transfer form within 30 days of signing up. Hostgator will do the rest.
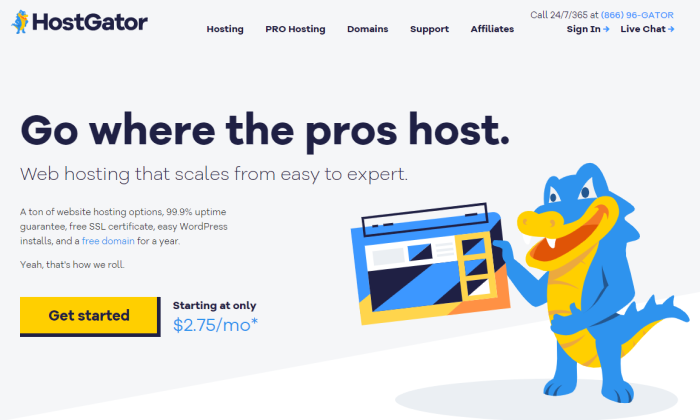
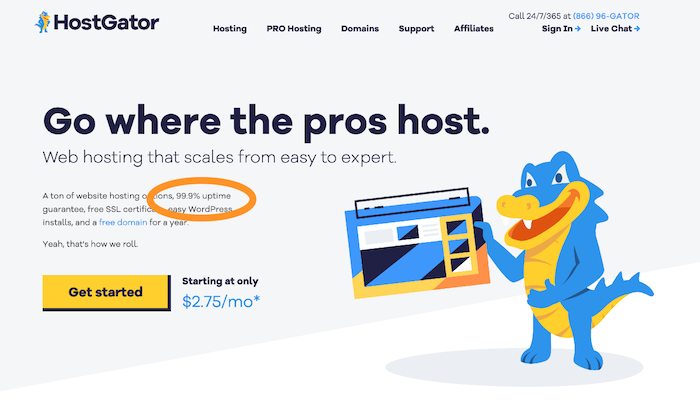
You get the free migration with any of Hostgator’s shared hosting plans, including Hatchling, which starts at $2.75/month with a contract.
With Hostgator, you can lock in a really low rate and get great uptime for less than you paid before. After the zero-stress migration, you get high quality customer support available any time of day by phone and live chat.
It’s cheaper web hosting, better service, and very few limits on what you can do. Some of the highlights include:
Unlimited storageUnlimited bandwidthFree SSL certificateFree emailFree domain (or registration transfer)One-click WordPress installFree website builderFree Google Ads and Bing Ads credits
The good news is that Hostgator provides tons of tools to help you optimize the content on your site and keep things running at top speed. The interface is very easy to use, which gives you complete control over your site and databases.
It’s comparable to Bluehost in a lot of ways, which I like better if you have a brand new site. But if you already have a website, Bluehost won’t move it over for free. Hostgator will. If you have more than one site to migrate, Hostgator will give you a quote for the cost, but the first one is free.
This makes your transition to cheaper hosting a lot easier. Plus, Hostgator offers a 45-day money-back guarantee. If you don’t like what you see, you have more than a month to jump ship without paying a cent.
#6 – iPage Go Review — The Best If You Have Multiple Sites
iPage Go lets you create unlimited websites for under $2/month. Every other plan on my list requires you to purchase an upgraded plan to support more than one site.
I really like iPage Go because there is one plan. Without tiered pricing, you don’t have to worry about upgrading your plan until you need something more substantial than shared hosting.
In other words, you can build as many websites as you want without having to stress about paying more to do more.
With iPage Go it’s unlimited sites, domains, and storage. Like similar “unlimited” offerings, your service has no hard and fast limits, but there are restrictions on how much your site can demand from the shared server.
So, when iPage says they offer scalable bandwidth, it means they aren’t metering the traffic to your site. You could still hit restrictions, but there is no set cap for the number site visitors.
Most people looking for cheap hosting for their websites won’t have to worry too much about these limits. iPage is able to support 99.5% of customers without any issues at all. In fact, the company will work with you to make sure you’ve optimized your site if you start to approach restricted usage limits.
In addition to providing the cheapest multi-site hosting option, iPage gives customers access to a ton of free tools to build and nurture their site.
You get a free domain name for the first year, along with a free SSL certificate. On top of that, you get free email with autoresponders. You can use the email provided, or manage your website accounts with Microsoft Outlook and other third-party apps.
iPage hosting includes a free website builder, which can help you customize the look and feel of all your sites. WordPress is a one click installation as are other popular content management systems like Joomla and Drupal.
For less than $2 per month, all of this is yours. Other benefits include:
24/7 customer serviceUnlimited databasesOne-click installs for OpenCart, Magneto, and PrestaShopPayPal integrationIntegration with popular email marketing software servicesSite traffic reporting30-day money-back guarantee
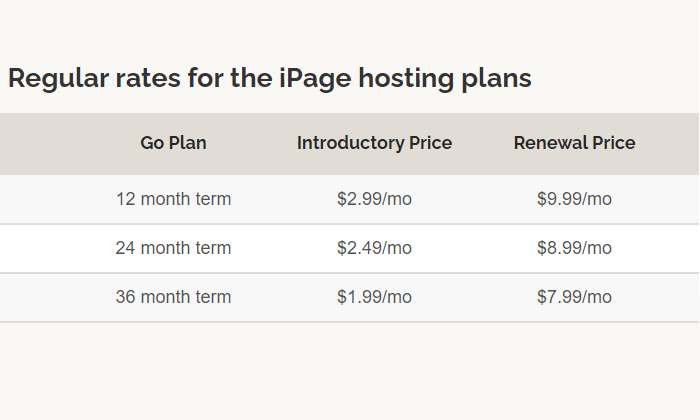
There is no month-to-month pricing for iPage Go. You can sign up for one, two, or three years. The longer the contract you sign, the lower the introductory pricing and renewal rate you get:
I’m not aware of another hosting provider who gives you a discount on your renewal rate for signing a long contract, so that is a unique perk.
As I mentioned, you’ll never have to upgrade to a different shared hosting plan. You get everything they offer with iPage Go. There are hardly any limits on your resources, and if your site gets too popular to be supported by shared hosting, iPage has some more powerful hosting solutions at competitive prices.
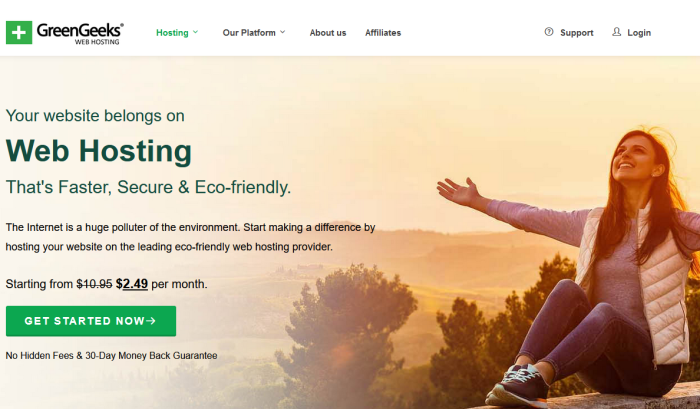
#7 – GreenGeeks Review — The Best Price for Managed WooCommerce Hosting
If you’re starting with a WordPress site (as many people do) and you’re looking to transform it into a potent online store, you ought to deploy WooCommerce. Sure, the plugin is free, but you’ll still need hosting and to manage your newly WooCommerce-enhanced site.
But, if you go with GreenGeeks, you can take care of all that in one fell swoop.
Much like A2 Hosting, you can get an affordable hosting plan that allows for an easy, one-click install of WooCommerce on your site. But, unlike A2, you get managed features like daily backups and automatic updates even at the lowest pricing tier.
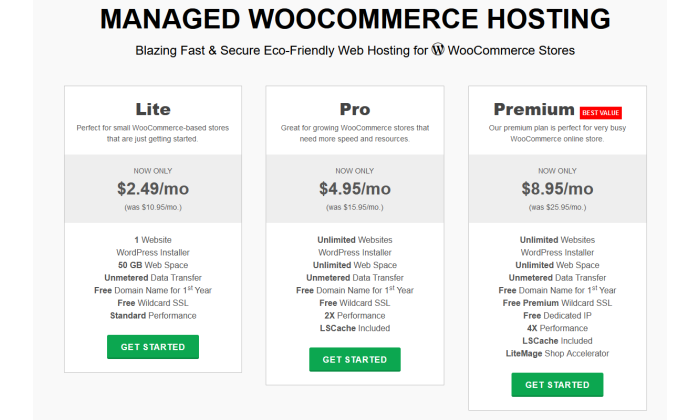
Speaking of pricing, GreenGeeks offers three levels of managed WooCommerce Hosting:
Lite: starting at $2.49/monthPro: starting at $4.95/monthPremium: starting at $8.95/month
The only drawback of that pricing structure is that the starting price is for a three-year commitment.
That could be a bit too much of a commitment for someone just trying GreenGeeks on for size or worried about massive, rapid scaling over that time. But GreenGeeks’ prices don’t jump up wildly for shorter terms, unlike some other providers.
For example, with the Lite package, a two-year commitment only raises the monthly cost $1.50 to $3.95/month. For a one-year term, it’s $4.95/month. Of course, month-to-month is the most expensive, but that rate of $10.95/month is right on par with A2’s base plan rate.
I mentioned above that even the Lite plan has daily backups and automatic plugin updates, but it also includes a free Wildcard SSL, unmetered data, a free domain name for the first year, and 50 GB of space for one website.
And, if you’re worried about scalability over the long haul, GreenGeeks’ Premium plan can put those fears to bed. With it, you get everything mentioned above, plus LSCache, LiteMage shop accelerator, a free dedicated IP, capacity for unlimited websites, and more.
All of this comes backed by some of the best customer support in the category. You can browse the GreenGeeks knowledge base or reach out to a rep via live chat, phone call, or email. Their phone center is available Monday through Sunday, 9 a.m. to midnight Eastern and GreenGeeks has a great track record of responding to any email request within 20 minutes.
What I Looked at to Find the Best Cheap Web Hosting
You’re looking for the cheapest plan out there, but you still need a dependable host.
There’s no shortage of budget-friendly web hosting options available. Each one promises great uptime, site performance, and customer support.
It seems like anyone can get their site up for less than the cost of a cup of coffee.
What’s the catch?
If you understand your options and pick the right one, there is no catch.
I’m going to guide you through saving every dollar possible without getting scammed or locked into a plan that you’ll regret later.
Use these four criteria to cut through the advertising gimmicks, rule out plans that are “too good to be true,” and hone in on the best deal for lowest price.
Price
When looking for web hosting in general, price is pretty important. But in looking at cheap web hosting, I’ve made pricing the most important criteria by far.
In other words, I asked myself: How can I get dependable hosting at the absolute lowest price?
Since you have to pay for hosting each month, even a few dollars’ difference between plans will add up over time.
I focused on web hosts with a rock solid reputation because their cheap hosting options don’t cut corners. These plans are no-frills hosting, for sure, but I made sure they cover all the essentials.
With some of the less reputable hosts out there, you can get a rock-bottom price and a rock-bottom experience.
The providers I chose have super-affordable plans that won’t cause trouble now, trap you into upgrading, or wind up costing a fortune down the road.
Contract Terms
Lots of web hosts might seem cheap at first glance, but you need to review the contract terms to truly get a sense of the actual cost.
To lock in the lowest possible rate, you’ll likely have to commit to a two, three, or even a four-year plan.
Importantly, these contracts are typically paid up-front and in-full.
That means that web hosting advertised at $3 per month could actually cost you upwards of $100 today.
Along with the length of the contract, you need to check the renewal rates. It’s common practice in the web hosting industry for hosting plans to skyrocket upon renewal.
Promotional pricing might cost $3 per month, but then automatically renew at something like $10 per month.
That would more than triple your rate upon renewal. Suddenly it’s not so cheap anymore.
Domain Limits
How many sites do you want?
If you add a site or two, you could accidentally get forced to upgrade and pay a lot more.
iPage, for example, lets people create as many websites as they want with their cheapest hosting plan.
With Hostinger, on the other hand, you’ll have to upgrade to host more than one site. That said, Hostinger’s next plan up is still less than $3 per month and you can build up to 100 websites.
Another important limit to consider is bandwidth. This is the maximum amount of data your site can transfer to users during a set amount of time.
Now there’s no such thing as unlimited bandwidth, but you are definitely going to see that advertised with a lot of the cheapest web hosting plans out there.
Why can they say this?
Because these are shared hosting plans where your site is on a server with a bunch of other sites. On a typical day, these sites are not going to use all of the server’s resources, so they say it’s unlimited.
The truth is that you will definitely still have limits on how much of the server’s central processing unit (CPU) your site can use.
Getting too many visitors to your site may exceed your CPU limits, and the provider may ask you to upgrade.
Shared hosting plans with unlimited bandwidth are perfect for cheap web hosting, just don’t equate it with unlimited visitors.
Free Tools to Build and Grow Your Site
You’d be surprised, but even some of the least expensive web hosting plans are packed with free tools and capabilities. Getting these freebies as part of a bundle can help you save in other areas.
Some of the features to look out for include:
Ad credits: free Google or Bing advertising credits to target your audienceDomain name: your site’s online address at www.your-domain-name.comEmail account: an address @your-domain-name.comSSL Certificates: protects online privacy and lets visitors know your site is secureVisual website builder: an application that lets even total newbies design beautiful pages
Everything that’s included with your hosting plan is something you don’t have to spend more money on.
It’s not hard to register your domain name, but if your hosting plan includes it, that’s going to save you $10-15 in the first year.
Getting a free professional email is another $30 in your pocket. The freebies add up.
Even Hostinger, which can be purchased for less than $1/month, comes with an email account, SSL certificate, and a website builder that requires zero coding knowledge to use.
Conclusion
You don’t have to spend very much to get your site online, but if you aren’t careful, web hosting can wind up costing a lot more than you think.
Choosing a reputable provider is the first step, but you don’t have to worry about that if you stick to my list of best cheap web hosts. These are all really well-known companies with a long history of dependable service.
Hostinger — Best web hosting plan under $1DreamHost — Lowest spend on day oneBluehost — Best for new sites (especially WordPress)A2 Hosting —Best web hosting under $3 for online storesHostGator — Best way to host your existing site for cheaperiPage Go — Best if you have multiple sitesGreenGeeks — Best price for managed WooCommerce hosting
To get the lowest per-month price, go with Hostinger. At less than $1/month, there is nothing else even close.
Of course, if you don’t want to lock into a long contract to get low rates with Hostinger, I recommend DreamHost. You can get high-quality hosting for less than $5/month without any commitment.
If you have a new site in mind and you want to get it off the ground quickly, Bluehost is the choice for you. It’s a little pricier than Hostinger, but still under $3/month. Plus Bluehost includes a free domain name for the first year (you’re going to need that for a new site), which saves another $10-15 right there.
If you have multiple sites to host, iPage should be your first and last stop. Unlimited websites for less than $2/month. Say no more.
Shortlist A2 Hosting for online stores. It’s well set up to handle the extra security and performance demands of ecommerce. If you’re running a web store on WooCommerce, think about GreenGeeks for a little extra savings for comparable performance.
And if you are tired of your current hosting situation, let Hostgator help. They will migrate your site to their servers for free. Then you can start saving money and enjoying quality customer service again.
Disclosure: This material is reader-supported, which implies if you click a few of our links that we might make a commission.
Despite worldwide financial unpredictability, ecommerce continues to grow and grow at a stable rate. More individuals are going shopping online than ever previously.
Want to participate the action?
Creating an ecommerce site or online shop is not that difficult. You wear’’ t need to understand any technical or programs understanding to start.
Finding success will require time and effort, no doubt. The most essential lessons you find out about running an online shop come after you release. You actually can’’ t get the experience anyother method.
.
Read on as I teach you how to get your ecommerce site up and running in no time.
. Your 2-Minute Cheat Sheet.
I’’ ll reveal you how you can develop an ecommerce site utilizing Shopify.
What works for me is the platform’’ s flexibility.
Whether you intend on releasing a brand-new ecommerce company from scratch or scaling it, Shopify has whatever you might potentially require. Plus, there’’ s the alternative to do a 14-day totally free trial!
.
Users can make the most of industry-specific design templates, customized domains, drag-and-drop shop contractor, limitless items, integrated payment processing, and 24/7 assistance.
Precisely why it’’ s among the very best.
.
After registering, you need to establish your online shop. You can tailor it by selecting a style or design that works finest for you.
Next, begin noting items on your site. This is likewise where you ought to focus on the item copy (hi SEO !).
Upload HD quality images with your items on a white background. Ensure your images have the very same measurements—– it simply makes whatever look neater.
Choose your payment entrance, which is a function that permits your clients to pay through your site.
You need to think about the deal charges, card types, and offsite checkout to understand the quantity of cash you’’ ll get after deducting all appropriate charges.
Get your online store live by completing details associated to tax and shipping. Provide your order system a test drive to make sure whatever is on track.
Lastly, you require a domain. You can either purchase one from Shopify itself or choose a 3rd party—– the option is yours.
And that’’ s it! Your brand-new Shopify shop is now prepared to generate the moolah.
.
Without more ado, let’’ s begin with the in-depth tutorial! Do not hesitate to leap ahead if you’’ ve currently looked after the early actions:
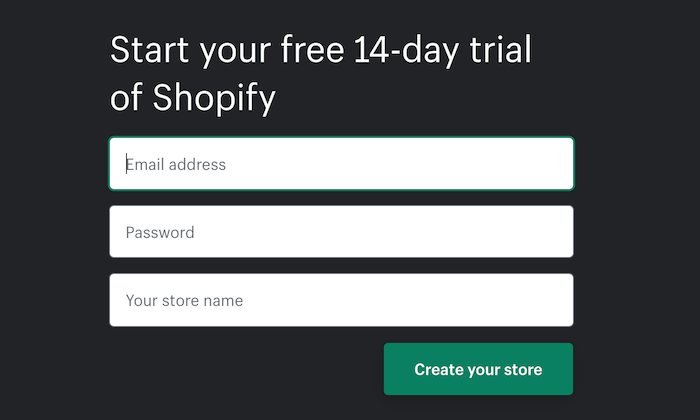
Head over to Shopify.com , and utilize the signup type to produce your account. You can begin your 14-day complimentary trial after filling out all the essential information.
You need to attempt to pick a distinct shop name. This shouldn’’ t be at the expense of simpleness or significance.
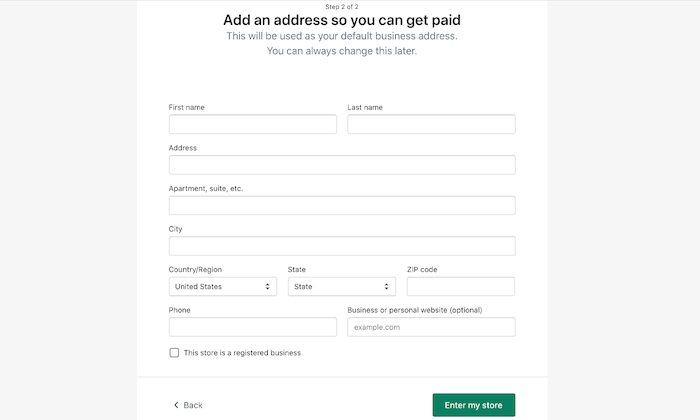
In case you key in a currently picked shop name, Shopify will ask you to return to something else. As soon as you get the site name arranged, you’’ ll need to complete a couple of other information, such as your name, nation, address, and contact number.
After this preliminary screening, you need to address whether you own items, and if you do, what you intend to offer.
In case you’’ re simply trying Shopify, you can choose choices like ‘‘ I ’ m simply messing around’ ’ in the Do you have items? dropdown menu and ‘‘ I ’ m still conceptualizing concepts ’ in the What will you offer? area.
Once you’’ re done, click I ’ m done.
.Action 2: Set up Your Shopify Online Store.
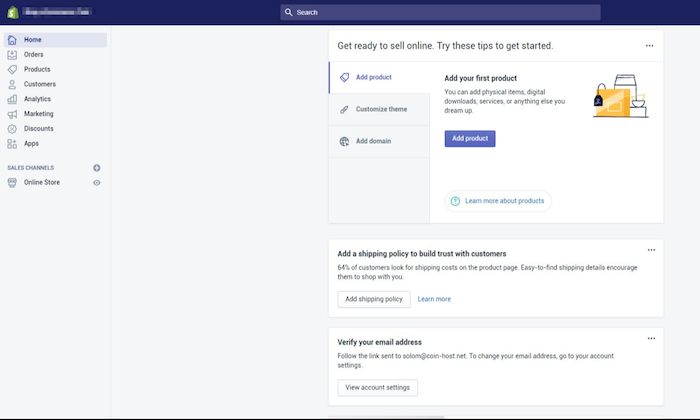
Once you’’ ve made your account on Shopify, you‘‘ ll be directed instantly to your shop admin screen or control panel. Your house admin screen will inform you whatever you ought to understand to get your website up and running.
At this point, you can begin tailoring your shop, submitting items, and establishing payments and shipping. You’’ ll likewise discover numerous other choices on the side menu bar, however at this minute, it’’ s best to stay with the essentials.
.Action 3: Choose a Theme or a Layout For Your Store.
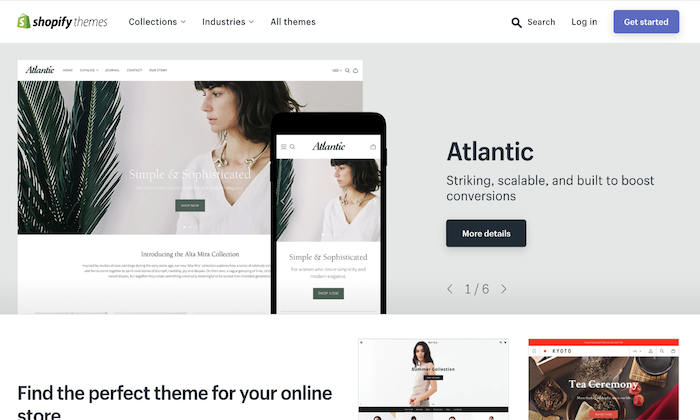
Shopify provides you direct access to a variety of styles thanks to its all main style shop . Every one of them is ensured to have complete assistance from the designers. You can rest simple understanding that your shop is constantly going to be in excellent hands.
The concept behind selecting a style is to produce a more on-brand site that looks excellent. This will keep your visitors on your site for longer and take a look at your items.
Each one of the styles has a thorough list of adjustments. You wear’’ t require any previous coding understanding.
If the complimentary styles wear’’ t attract you, you can constantly pick the premium variations that include more functions and personalization alternatives. Truthfully, this likewise looks far better when compared to a complimentary one—– offered you pick the right alternative.
Another reason I like Shopify a lot is that it’’ s exceptionally easy to use. Even if you choose to make significant modifications to a style, the restrictions are couple of.
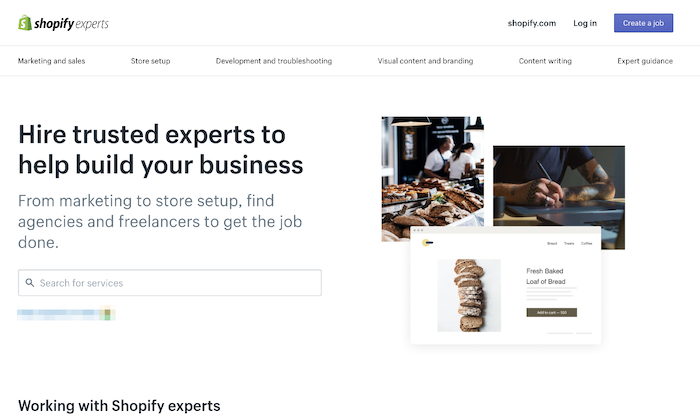
You wear’’ t need to stress over not having any coding experience. Shopify has a worldwide group of style companies—– called Shopify Experts —– that can completely tailor your ecommerce site. You’’ ll have to pay for this professional service.
Here are a couple of fast pointers to assist you discover the ideal Shopify style:
.# 1 Go Through the entire Theme Store.
Once you check out the URL, be prepared to be stunned.
You overcome 70 style variations—– out of which there are many fantastic complimentary ones, too—– that you can utilize for your Shopify shop. Aside from this, you can likewise discover Shopify styles on other markets like TemplateMonster .
Try to select a style that matches your brand name and, naturally, fulfills your individual choice.
You likewise have the choice to filter the styles by paid or complimentary, functions, and market. If you wish to be much more selective, you can include filters for rate, appeal, and latest.
.# 2 Check Out the Theme’’ s Reviews.
After you pick a style you like, click its sample image. You’’ ll discover more info about the style, like whether it’’ s mobile-friendly, responsive, to name a few functions.
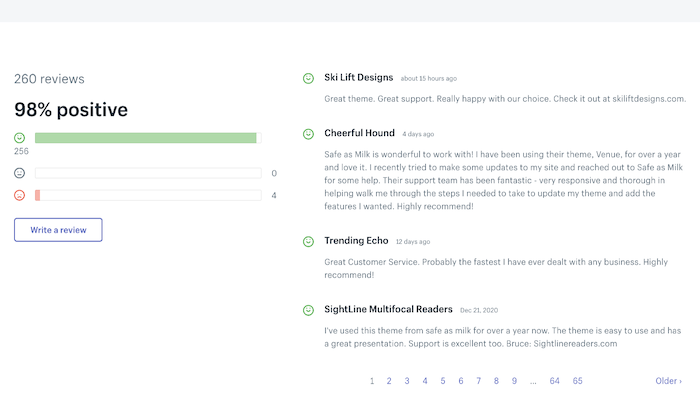
Scroll to check out evaluations composed by individuals who formerly utilized the style to discover more about their experiences.
.# 3 Preview the Theme.
Shopify offers you the choice to see your picked style live. Click View Demo situated listed below the green ‘‘ Preview Theme in your Store’ ’ button.
.
The sneak peek function is a fantastic choice for styles that have a series of designs. In its lack, you would discover yourself duplicating the entire choice procedure once again and once again till you’’d discover the ideal match. Yikes.
.# 4 Get the Shopify Theme.
If you like the demonstration variation of a particular style, all that’’ s left for you to do is click the green button to get it.
.
When Shopify asks you to offer your verification about setting up the style, click Publish as my Shop’’ s Theme. And if you ’ re still unpredictable about your selected style, you can constantly alter it later on.
Shopify will inform you when your style completes setting up and after that provide you the alternative to Go to your Theme Manager.
This supervisor includes all your released styles (the one you’’ ve set up or triggered most just recently), together with unpublished styles (formerly set up styles).
.Step 4: Customize Your Store Settings.
Shopify styles resemble your individual fairy godmother.
They totally change the method your ecommerce site looks, offering it a distinct look even when countless other users download the extremely exact same style.
How is this possible?
You can make basic modifications by modifying your settings.
Select Themes from the left navigation menu. You’’ ll see your live style in a box at the really leading.
.
This box will consist of 2 buttons situated in the leading right corner of package. The very first one with 3 dots enables you to make standard settings modifications.
One of them will permit you to replicate your style. I encourage you to do this as a backup. If you put on’’ t like the modifications you make, you can constantly erase them and begin working once again from the replicate.
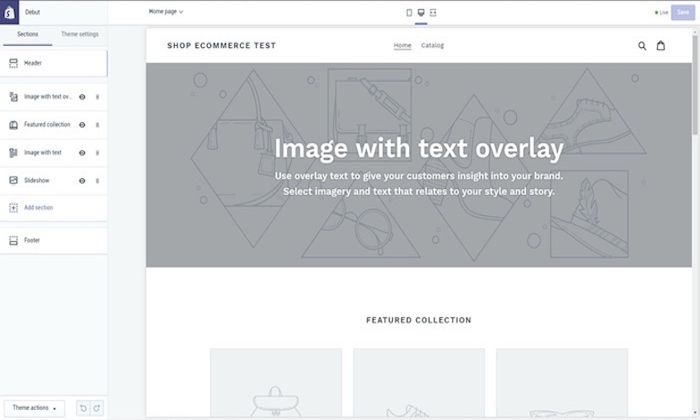
The 2nd button is ‘‘ Customize Theme.’ ’ Clicking on it will direct you to a page that manages all the standard performance of your shop. This is where you can make huge modifications and test out all functions to comprehend what your site is genuinely efficient in.
Other choices let you rearrange aspects on pages, consisting of revealing item images left wing, right, or center of the page. You can likewise pick whether you’’d like to show social networks icons, such as like, +1, pin, or tweet.
.Step 5: List Products on Your Ecommerce Website.
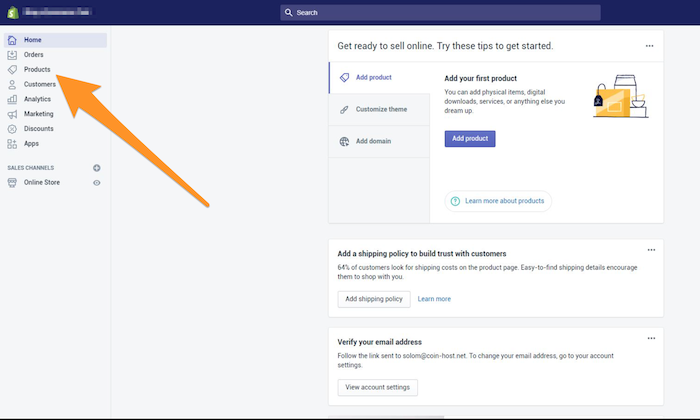
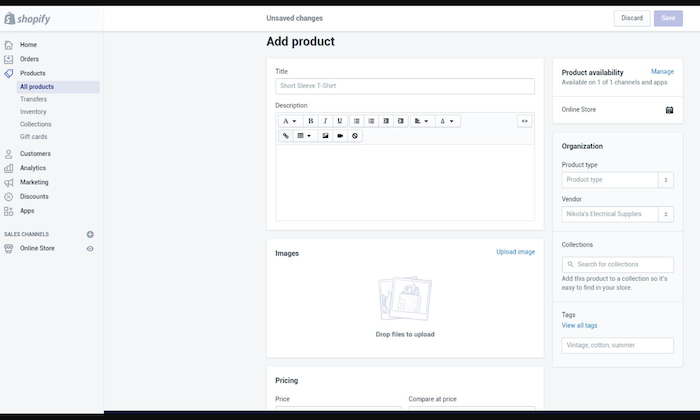
Click on Products on the left side menu on your admin screen.
You’’ ll see a blue Add Product button in the middle of the page. Click it. This will enable you to include as much information as you desire about your items.
Pay attention to items that might do with some SEO optimization, including their description, name, and url. Attempt to include as numerous information as you can to offer your client a clear concept about your items.
This is likewise the screen where you publish HD-quality pictures of your items—– ideally on a white background. As soon as your images are submitted, you can reorganize them nevertheless you like, so there’’ s no trouble of needing to publish them in a particular order.
I actually can not highlight enough the power of item images.
Product images contribute in making a sale. This is why you must make a point to include just the very best images that highlight distinct or unique functions in the close-up pictures of the products.
Another pointer would be to make sure all images have the exact same measurements.
This will offer your site an extremely neat look. If you desire to make your pages look comparable to a Pinterest board, you can do that too.
Finally, click Save Product situated at the bottom and leading best corners to conserve all your modifications.
That’’ s not all.
.
When including images, you ought to develop collections to lure your visitor by offering a number of comparable choices on the very same page, enhancing your possibilities of making a sale.
Option A: Set up Collections of Groups of Products
A collection of a group of items consists of products that have a couple of functions in typical. Here are a couple of collection concepts that you can think about:
.Products on saleItems in particular colors and sizesItems separated based upon gender and age, like guys, childrenitems, or females coming from the exact same item classification, like fans, battery chargers, precious jewelry, and so on.
The fascinating thing here is that a single product can appear in any variety of collections. A size medium white t-shirt will be noted under at least 3 collections: White Color, Women/Men, and Size Medium. You can note your collection names on the homepage in the navigation bar.
Your clients will thank you as they won’’ t need to go through your entire brochure simply to discover a particular product.
Option 2: Manual and Automatic Collections
When you include a brand-new collection, you can pick how to include the items. Presently, there are 2 methods of doing this:
.By hand –– You separately include and get rid of items in the collection.Automatically –– You established particular choice conditions that will immediately include items that satisfy the requirements.
While you are at it, select a payment entrance, too. This is a function that allows your consumers to spend for items straight through your site.
Not all payment entrances are produced equivalent.
Make sure you go through the deal charges, card types, and offsite checkout to pick a choice that you discover most proper.
.Action 6: Make Your Shopify Store Live.
Before your website goes live, you require to include a couple of more information about your business and how you will provide the products and pay taxes.
Tick the checkboxes versus Charge taxes and Requires shipping any place appropriate. You’’ ll discover these alternatives under the Variants area of the Products page after you click the name of a provided item.
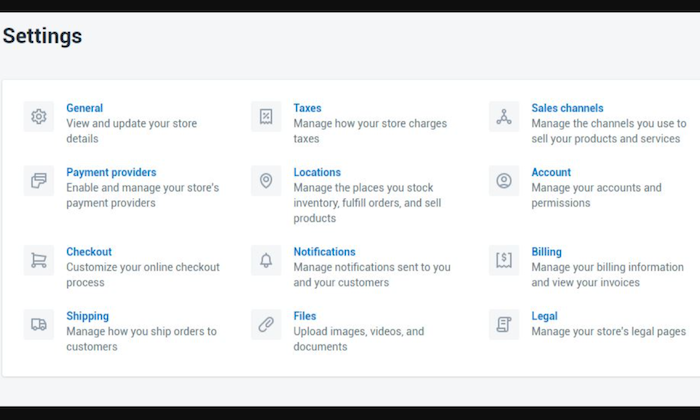
Go to Settings to submit this info. I’’d suggest utilizing the Google Analytics function to keep an eye on your shop visitors, too.
.Do a Test Transaction.
This is the supreme test to see whether your shop is on track and get a concept of what your clients will experience when they put an order from your Shopify shop.
You can utilize Shopify’’ s Bogus Gateway for this.
. Select Settings from your shop Admin, followed by Payments.If you have the charge card payment entrance made it possible for, deactivate it. Click Edit, and after that verify your deactivation after choosing Deactivate.Under the Accept charge card area, pick to Select a Credit Card Gateway. This will open a drop-down menu.Scroll to Other, and after that choose Bogus Gateway.Choose Activate—– or Reactivate if you’’ ve utilized Bogus Gateway before.Return to your shop, and put an order as a client generally would. At checkout, go into the fake charge card information rather of authentic numbers.
If you choose putting an authentic deal, you can do that, too. Simply keep in mind to cancel the order instantly to reimburse yourself and prevent paying deal charges.
.Action 7: Get a Domain Name.
You require a domain to make your website live. I‘‘ ll inform you 2 methods you can do this:
. You can purchase a domain from Shopify, which will be included to your shop instantly. This is excellent and time-saving for individuals who put on’’ t understand much about webhosting. This expenses in between $9 and $15 every year. Second, you can purchase a domain from a third-party like GoDaddy. These domains begin with $10 each year. Keep in mind, you’’ ll need to reroute the DNS records yourself in this case. If you put on’’ t wish to’do that, it ’ s much better to purchase a domain from Shopify itself.
If you do wish to put your Shopify shop reside on a third-party domain, follow the listed below actions:
# 1 Add the brand-new domain in Shopify.
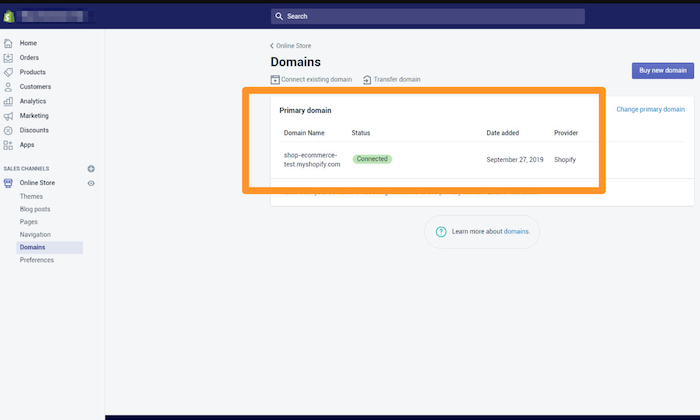
On the left navigation menu in the Admin page, go to Settings and after that Domains. Include your domain after clicking the ‘‘ Add a current domain’ ’ button.
.
# 2 Update your DNS records.
Log into your domain registrar (example: GoDaddy) to make the following modifications:
Replace the @ or primary A record with the following IP address: 23.227.38.32
Replace the www or include CNAME with yourstorename.myshopify.com.
# 3 Remove any shop passwords.
# 4 Set your Shopify shop as the main.
Go to your online shop, and click Domains. Pick your primary domain by utilizing the dropdown button. Examine the Redirect all traffic to this domain. This will direct all your traffic from other domains to your main domain.
# 5 Add other domains.
Repeat the very first 2 actions with any other domain you utilize. All traffic from these domains will be rerouted to the main domain, which you embed in action 4.
.Conclusion.
Congratulations! Your brand-new Shopify ecommerce shop is now up and running. You’’ re now entirely prepared to get a taste of being an ecommerce seller.
The good idea about Shopify is you can tailor your shop to your preference as lot of times as required to keep whatever practical and practical for you.
Keep exploring as you go, and you’’ ll discover your success mantra.
Which ecommerce site contractor do you choose? Is it Shopify or others like Wix, WooCommerce, or something else? Let me understand in the remarks listed below.
Disclosure: This material is reader-supported, which implies if you click a few of our links that we might make a commission.
Making a site has actually gotten much, a lot easier for many years. It’’ s more affordable, quicker, and more uncomplicated than ever in the past.
But what do you truly require to construct a site?
A steady web connection and simply an hour or 2 of your time is plenty.
You put on’’ t require any web advancement experience or lots of cash, wear’’ t concern.
.
In this detailed guide, I’’ ll teach you how to make a site from scratch in simply one afternoon. When beginning at ground no, simply follow my strategies listed below to prevent making the very same errors I made.
Ready? Let’’ s dig right in!
. Your 2-Minute Cheat Sheet.
Here’’ s your quick-start guide to making a site. Keep in mind, this area doesn’’ t cover whatever– simply the important actions– whatever is broken down in more information listed below.
Start by picking the best webhosting. We extremely suggest Bluehost for speed and dependability. Oh, and it’’ s a great rate.
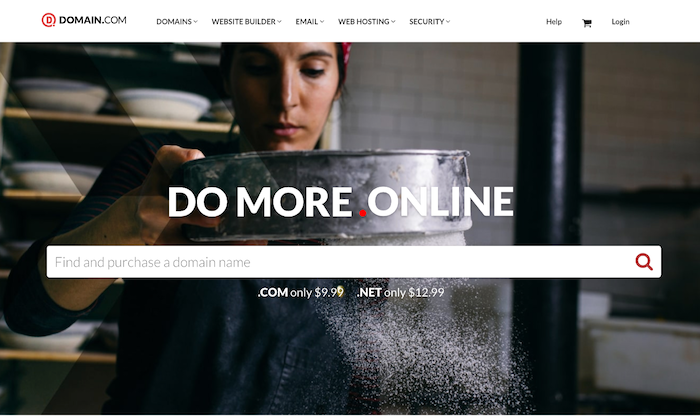
Then you’’ ll require a domain that represents what your site is going to be everything about. Since it assists you make brownie points in the eyes of visitors, A.com domain name is best.
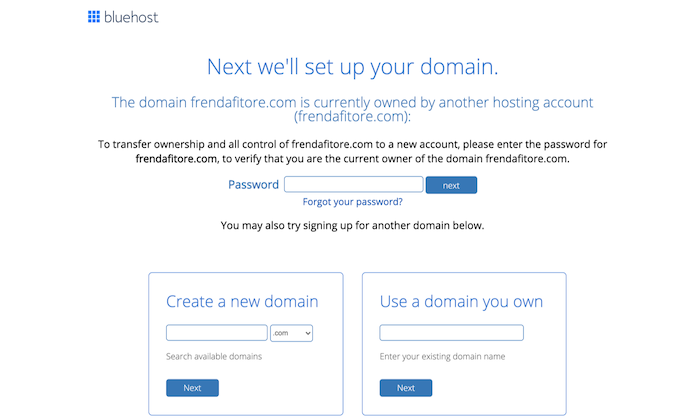
One factor I like Bluehost a lot is that they include a totally free domain for the very first year. That conserves you some money and the additional action of needing to go through a domain registrar.
Once you’’ ve registered your domain, select a content management system or CMS. You can think about WordPress, Joomla, or Drupal, to name a few.
I like WordPress the very best and it’’ s what I utilize for my website. WordPress is a one-click set up if you go with Bluehost.
.
Boom, now you have a variation of a site up and running. Congrats!
But you aren’’ t done.
.
Next on your list would be to market your organization. Considering that branding is important today, you require to think about a logo design, compose your site copy, strategy your marketing method, and certainly set up Google Analytics.
Basically, the amazing things that you might understand everything about currently.
Now let’’ s go over how to develop a site in more information. Keep reading or leap best to the action you require assist with:
Do you keep in mind how your school library had those big classified bookshelves?
A webhosting business is specifically like that bookshelf, while the library is the web.
A hosting provider or a webhosting business shops your site on a server, making whatever you installed on your site noticeable on the web and your visitors.
These business use yearly or month-to-month intend on shared servers, devoted servers, or virtual personal servers, permitting you to select a strategy according to your security and assistance requirements.
If your site doesn’’ t gather or keep monetary or individual information, you can constantly pick the fundamental strategy. You put on’’ t have to shell out a lot of cash.
.
But how do you understand which webhosting business or service is ideal for you?
.Website Speed.
If you wish to generate income from your site, you require to get a quick and steady webhosting.
Fast websites have lots of things opting for them. They rank much better, aid with SEO , and optimize conversions.
I would 100% advise Bluehost , as it keeps packing time brief and very little.
That stated, we would likewise encourage you to prevent shared hosting or excessively low-cost services.
Shared hosting ways you’’ ll be sharing your web server with countless other websites. To put it simply, hosting speed will be sluggish–– plus, you might even wind up sharing the server with spammy websites, which you might wind up with you dealing with the impact of Google.
As for avoiding low-cost hosting services, the guideline here is basic: You get what you spend for.
The level of speed, security, and uptime wouldn’’ t be as fantastic when you pay$ 5 each month, particularly when you compare it to strategies costing more than $120 each month.
I’’ m not informing you to purchase the most pricey strategy–– simply prevent the most inexpensive hosting.
.Uptime Dependability.
Your webhosting service ought to constantly run effectively. Otherwise, nobody can access your site.
A great hosting supplier supplies you an uptime assurance–– something like ““ We provide a 100% network uptime assurance” ” or comparable claims.
For circumstances, if a hosting company informs you 99% uptime, your website can be down for 3.5 days a year. Companies using 99.99% or 99.999% will have about one hour and 5 minutes downtime, respectively.
Look for a company that provides a warranty for insurance coverage. If your site decreases, you can be compensated with hosting credits.
.Consumer Support.
You’’ ll requirement effective and fast backup assistance when technical troubles occur. Email, telephone, or chat –– there are different assistance techniques. In my experience, however, e-mail is the outright worst. It’’ s better to get assistance by phone or live chat.
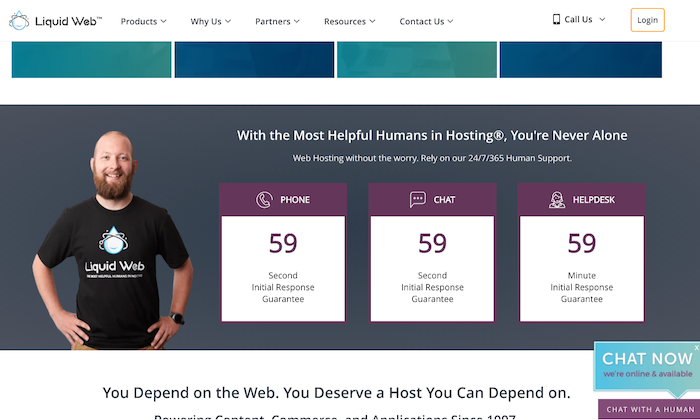
Choose a hosting company that uses 24/7 assistance. By doing this, you’’ ll have the ability to get your company back online if something fails within minutes.
You must likewise inspect your service level contract (SLA) to get a concept of the sort of assistance you’’ ll get. Taking a look at the business’’ s site will offer you a concept about their assistance group too.
Scalability.
Scalability is essential for 2 factors. A hosting service provider must grow naturally with you, allowing you to update when required. Second, your site ought to have the ability to deal with huge spikes in visitor numbers.
Consider the following concerns to comprehend whether your webhosting is versatile:
.Will the webhosting upgrade you from an entry-level shared hosting strategy to an intermediate VPS when your visitor numbers reach a specific level with no downtime?How simple is this upgrade process?Can the webhosting assistance seasonal changes in web traffic perfectly?
You must intend to get an option that examines all 3 boxes.
Visit webhosting online forums to learn more about other individuals’’ s experiences with companies. Compare costs and services to figure out the best strategy based on your requirements and budget plan.
With a webhosting company in location, you can carry on to Step 2.
.Action # 2: Select a Relevant and special Domain Name.
Don’’ t go searching for the best domain– there isn ’ t one. Some names much better than others,’however eventually, it ’ s a little part of your service. The material of your site stays essential.
.
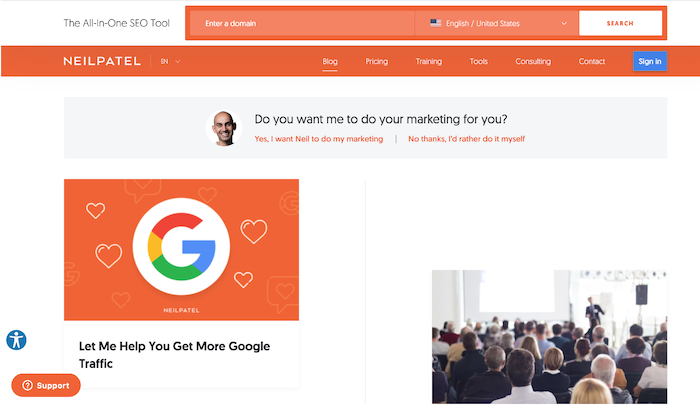
A domain is’your site ’ s address on the web. Mine is NeilPatel.com, and it shows my individual brand name. Yours can be anything you desire it to be, offered it’’ s connected to your service, subjects that you wish to discuss, or your name.
The choices are unlimited!
Following are a couple of guidelines to assist you pick the ideal domain:
.Keep it relevantStick to brief, remarkable namesAvoid numbersChoose a.com,. org, or.netMake sure your selected domain is offered.
Find the best name is likewise possible utilizing the following approaches:
.Approach 1 –– Brute Force Method.
Many have the imagination to come up with the ideal domain separately. If that’’ s you, you ’ ll require a domain registrar to acquire the domain, and after that browse the schedule of your potential domain.
Bluehost is an excellent location to begin, as it provides you a totally free domain for one year with their hosting strategies, and you can browse schedule.
I’’ ll likewise recommend you to prevent opting for domain that have hyphens (like neil-patel-marketing. When you get it at an inexpensive cost, com) even. It can get complicated.
.Technique 2 –– Use a Tool.
Some of us are not extremely imaginative, which’’ s fine.
.
If you get stuck when creating a domain, attempt utilizing name generators. Simply go into a couple of keywords, and the generator will try to find methods to integrate those words into a domain.
In addition to speed and downtime dependability, Bluehost likewise permits you to examine domain schedule. Check out the register now page and enter your domain in package, and voila! You’’ ll have a name.
.
Bear in mind that your favored domain might be not available. Attempt blending words, utilizing a thesaurus, or including a verb if it takes place.
After you’’ ve picked your domain, you’’ ll next requirement a site structure platform.
.Action # 3: Select a Good Website Building Platform or CMS.
A fast Google search about site home builders and CMS will leave you overwhelmed with the enormity of choices.
CMS means Content Management System. It enables you to modify your site within the domain itself, assisting you conserve lots of time and make whatever method easier. Personalizing designs, settings, material, developing brand-new pages and posts, and so on, ends up being simpler thanks to ready-to-use site design templates.
Here are a couple of choices to think about:
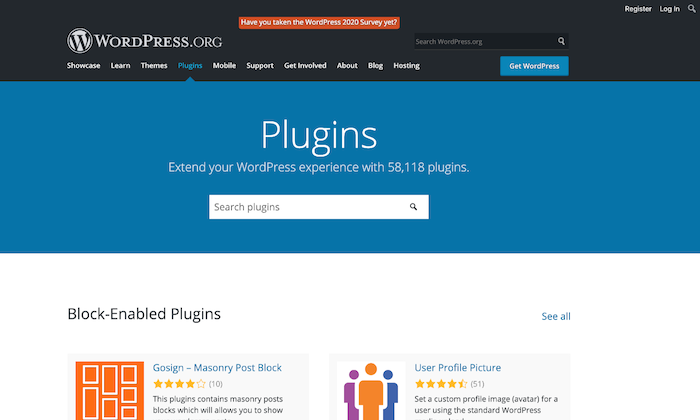
WordPress . When it comes to CMSs, WordPress is number one. It’’ s popular, easy to use, and incredibly simple to utilize. The platform has over 58,000 plugins that permit you to do practically anything you desire on your website.
Keep in mind that WordPress.com and WordPress.org aren’’ t the exact same. While the previous is a third-party website that permits you to produce totally free blog sites, the latter allows you to download the WordPress software application to set up on a site.
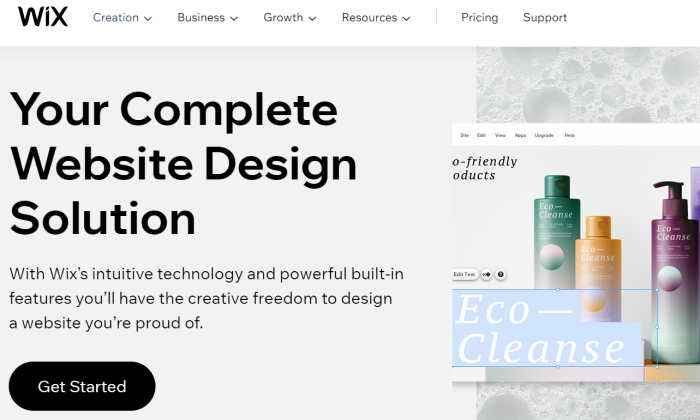
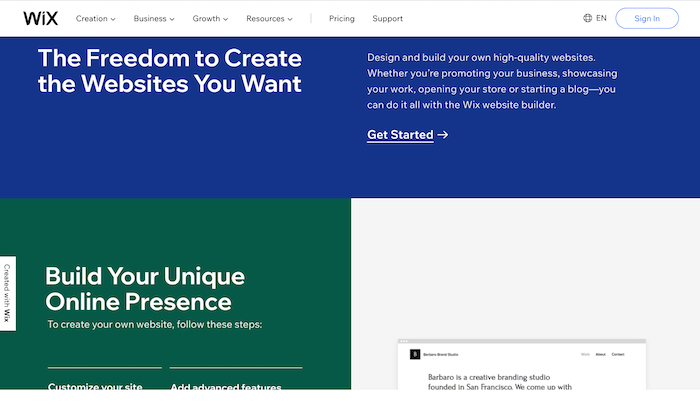
Wix . Wix is another site contractor that makes things very simple. If you require a website with simply a couple of pages, like dining establishments, regional services, freelancers, or portfolio websites, this might be a fantastic alternative.
However, if you wish to construct a big website, Wix might do not have the innovative functions needed for big quantities of traffic.
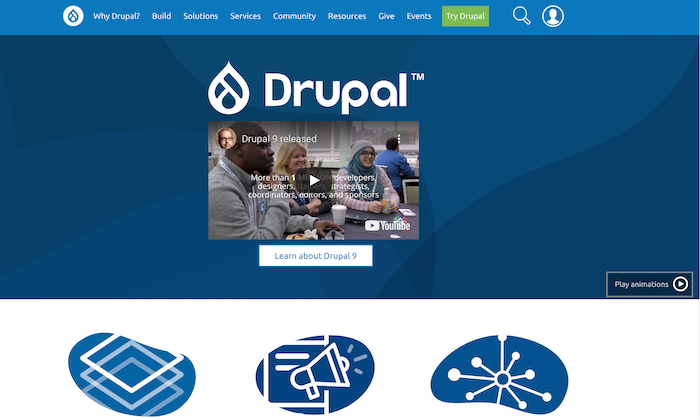
.Drupal. Drupal is the most sophisticated site structure service, which is why it has a steeper knowing curve. When you think about the level of modification it provides, the tough work appears worth it.
While I wear’’ t advise Drupal for novices, if advance modification is a concern on your list, this is by far the very best choice. You can constantly employ a specialist to discover the ropes of the platform.
You’’ ll now have a site up and running. All that is delegated do is to make it look terrific.
.Action # 4: Design Your Website to Make It Look Awesome.
For any site contractor, you’’ ll need to set up a style. Styles can be complimentary and paid, however the latter is more professional-looking and offers you more versatility when tailoring your site. They aren’’ t exceedingly pricey also and can be purchased for less than $100.
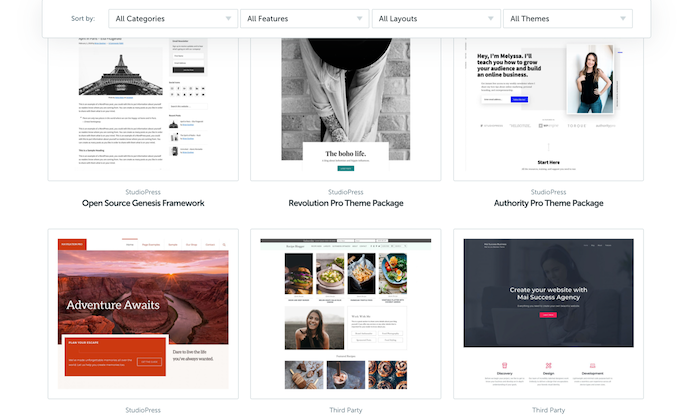
WordPress and Wix have some fantastic complimentary styles, however if you wish to try the premium range, you can offer StudioPress a shot.
Themes are developed on the fundamental CMS however are personalized to offer your site a special appearance and enable it to work in a different way. Shouldn’’ t an artist ’ s site look various from a dining establishment or a saas?
Visual representation is exceptionally essential as your visitors evaluate your site in a split second based upon how it looks. If your website looks outdated, unreliable, or doesn’’ t match their expectations, your visitors will be entered seconds.
Luckily, picking an excellent style is simple.
I suggest checking out evaluations about the styles prior to selecting and never ever focusing on visual appeal over performance.
Yes, you desire your site to look excellent with all those expensive typefaces and colors, however that shouldn’’ t be at the expense of performance.
Additionally, you can constantly alter the style at a later date. Simply wear’’ t modification it regularly, as it will hurt SEO and branding.
. Action # 5: Protect Your Website by utilizing a Child Theme.
The finest method to secure your site is to utilize a kid style.A kid style is a design sheet kept independently from the rest of your style ’ s files on the webserver. Not just will it make your website difficult to break, however it even secures you from renovating modifications whenever you upgrade a style.
.
Keep in mind that various site home builders have variousnames for developing a kid style.
.
You develop a “ kid style ” in WordPress, however you develop a ““ sub-theme ” in Drupal. “some sites wear ’ t permit you to develop a kid style’, however you can constantly make a replicate style to serve as back up, as in Joomla.
. Action # 6: Configure Your Website and AddRelevant Content.
At this point, you ’ re made with the majority of the technical part and can now lastly concentrate on the more intriguing things.
.
Start by establishing navigation to make it simpler for visitors to understand what your site is everything about and approve them simple access to various parts of your site. Pick a number of colors to represent your website without overdoing it.
.
For circumstances, I selected orange and white.
Organize, different, and highlight the essential locations of your site to make it clear and attractive. You can likewise set up plugins to assist your site function efficiently.
Here is a fast list of things you require to begin marketing your organization, particularly if you wish to generate income from the site:
.Get a logo design. This will represent your brand name, so be really mindful here.Write your site copy, consisting of the web page, About Me page, and other fundamental pages.Install Google Analytics code to your site to keep an eye on visitors.Start preparing your marketing method to find out your visitor’’ s likes and dislikes.
Making a site does have its reasonable share of battles, however the more experience you get, the much better you’’ ll ended up being, and the much easier it’’ ll be.
.
While we ’ ve covered all the essential information for constructing your very first site, if you discover yourself getting stuck anywhere, you can rely on Google or YouTube to resolve your issue.
Trust me, there are tutorials for nearly whatever out there on the web.
Choosing a webhosting and CMS, creating your site, and marketing is simply the pointer of the iceberg. You can’’ t anticipate over night success, however was simply a little bit of perseverance, you’’ ll see genuine development.
Have you been treating your landing pages as the preferred kid while leaving your homepage secured the downstairs closet as if it was your undesirable embraced nephew?
Just like Harry Potter, your homepage has wonderful powers. The issue is that it can’’ t reveal you those powers if you put on ’ t offer it the possibility.
.
What if your landing page was generating sales much faster than those Hogwarts approval letters flew into Harry’’ s house?
.
That ’ s the power of your homepage. You’’ re reading that. We stated homepage … not landing page.
Landing pages have actually gotten a great deal of credit over the previous couple of years. They’’ ve end up being the Dudley Dursley of the family. The preferred, even if they wear’’ t constantly pull the most weight. We have absolutely nothing versus landing pages, we enjoy them and utilize them all the time.
The issue depends on the Zero Moment of Truth. That’’ s where your homepage ends up being a requirement in closing the sale … yet couple of online marketers understand about this minute (and less utilize it tactically). The Zero Moment of Truth was found by Google and reveals why even the very best landing page requires a terrific homepage standing beside it.
Before we discuss the Zero Moment of Truth, let’’ s teach you how to find the distinction in between a landing page and a homepage in the wild.
.Landing Page vs. Homepage.
Landing pages and homepages have 2 various objectives. That’’ s why they put on ’ t look the very same and why they have various names.
.
Landing pages are created for action. On a landing page, you ’ re asking a visitor to do something. It might be to purchase an item, opt-in to an e-mail list, schedule a call, take part in a webinar, register for a complimentary trial, and so on. Your landing page centers around the objective of getting somebody to take a single action.
.
Everything on your landing page is put there to tactically move somebody closer to taking that action. On landing pages, you’’ re visiting great deals of copy discussing the item (or lead magnet, webinar, and so on) and calling out the consumer avatar.
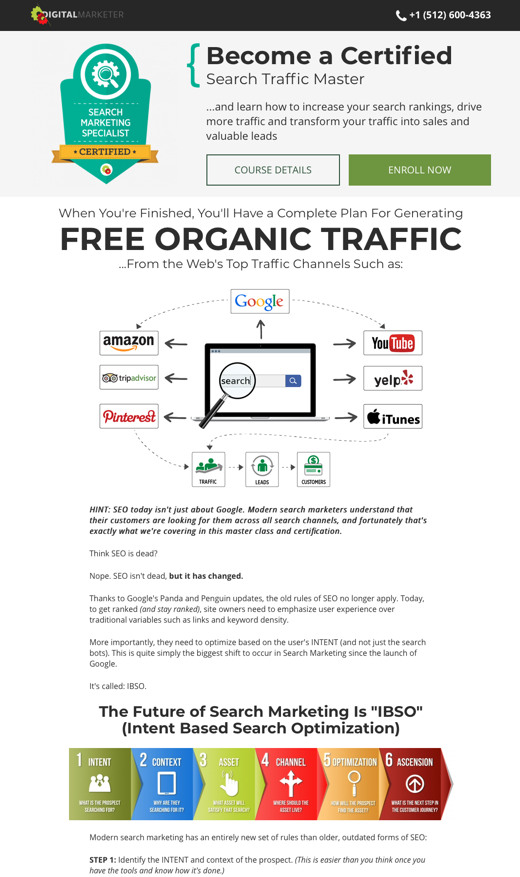
Here’’ s our landing page for our Search Marketing Specialist Certification . This is simply ¼ of the whole page ( click on this link to see the whole page). Notification just how much copy is on it? All of that copy centers around one action: Enroll Now.
Here are some indicators you’’ re taking a look at a landing page:
. It ’ s long( like you ’ re scrolling and scrolling and’scrolling) There ’ s a great deal of copy’( the more words, the greater possibility it ’ s a landing page) It speaks about ONE thing( item, lead magnet, webinar, opt-in, and so on) Every button is for the very same action (even if the copy a little varies).
Homepages are various. Homepages aren’’ t promoting action. You ’ ll absolutely have call to action buttons on your homepage, however they’’ re not the primary occasion. On your homepage, you’’ re seeking to do more than simply develop action. The objective of your homepage is to clarify the advantage of your company, develop trust with the visitor, and point the method to what they can do next.
While landing pages are produced to tactically move somebody to doing something about it, your homepage needs to do more than simply that a person task. Your homepage is informing brand name brand-new visitors who you are and what you do, why they need to appreciate your organization, and what they must do now.
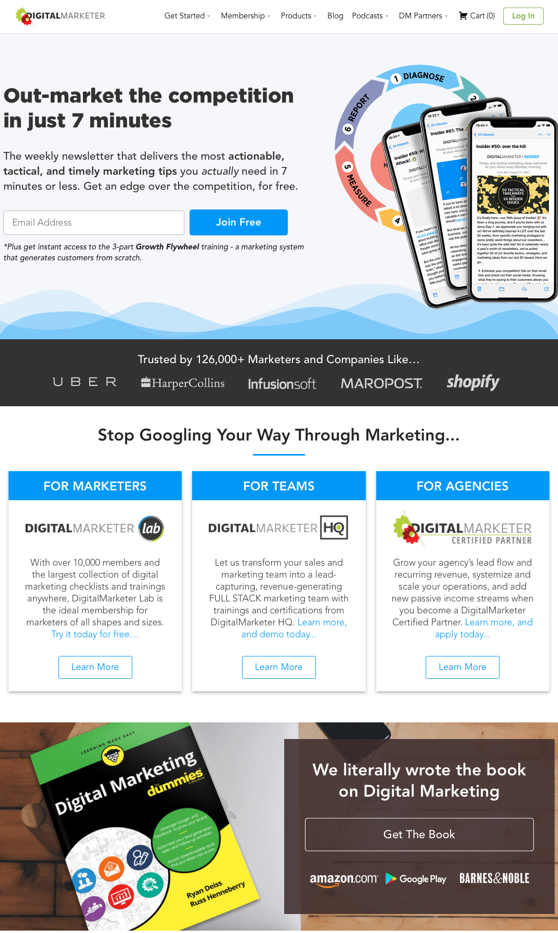
Here’’ s the DigitalMarketer homepage . This has to do with ¾ of the whole page( click this link to see the whole thing). Notification how little copy there is and how you can currently see 5 various calls to action.
You’’ re taking a look at a homepage when:
. It takes you a couple of scrolls to get to the bottom of the pageYou wear’’ t see paragraph after paragraph of copyIt discuss numerous items or discusses a couple of client avatarsThere is more than one kind of action being asked of the visitor.
When we’’ re selling items, we constantly point individuals to landing pages. We put on’’ t wish to send out hot leads to our homepage where they ’ ll need to make their method through a number of calls to action and menus to discover the item they’’ re trying to find.
.
So, why do homepages matter?
Thanks to Google research study, we understand why homepages are still appropriate. All of it boils down to the Zero Moment of Truth.
.The Zero Moment of Truth.
Even though it seems like it came out of a futuristic TELEVISION program about area, the Zero Moment of Truth relates to you as you read this. You put on’’ t require a spaceship to Mars to begin utilizing this in your marketing technique.
What you require is an understanding of how human beings purchase online items. When somebody reaches your item page, they’’ re in the First Moment of Truth. To get to the Zero Moment of Truth, they take an action backwards.
Instead of clicking that lovely Buy Now button, they move their mouse North, discover your menu, and click your homepage.
Why?
For the exact same factor we have a homepage in the very first location. If they trust you, this visitor is looking for explanation and to figure out. After a fast scroll through your homepage to make certain you have a look at, they’’ ll head back to the item page and struck that Buy Now button.
Here’’ s Google ’ s video describing the Zero Moment of Truth:
.
Your homepage is that last action a hot lead requires to ensure they understand who they’’ re purchasing from. We’’ re so utilized to thinking about homepages as the primary step, that we forget to develop a homepage that clarifies who we are and develops the trust these leads are searching for.
Most notably—– we need to do all of that in 7 seconds or less.
.What Your Homepage Should Look Like.
You’’ re one fast Google search far from swimming in homepage design templates. Here’’ s the issue … how do you in fact understand that these design templates work for YOUR organization?
Founder and CEO of DigitalMarketer Ryan Deiss utilizes Homepage Lifecycles to reveal why all homepages are not equivalent. You ought to * not * be attempting to reproduce Apple’’ s homepage. You ’ re not in the very same Lifecycle as them, and you ’ re going to puzzle your visitors and they ’ re not going to get the trust they were trying to find.
.
There are 4 Homepage Lifecycle Phases:
.
Phase 1: Problem Aware (the consumer understands they have an issue)
.
Phase 2: Solution Aware (the client is examining which option is best for them)
Phase 3: Product Aware (individuals currently understand your item)
Phase 4: Most Aware (individuals understand precisely what you offer and who you are)
You’’ re either in Phase 1 or Phase 2. (Apple remains in Phase 4)
In Phase 1, your audience is seeking to discover hope on your homepage. They wish to know that there is a service to their issue.
In Phase 2, your audience requires clearness. They’’ re seeking to see how you’’ re the best service for them in contrast to the competitors.
Oh yeah—– you require to do all of this in 7-seconds or less.
Why 7 seconds?
That’’ s the attention period that we’’ re dealing with nowadays. Your audience isn’’ t going to offer your site a complete 60 review through if they’’ re not feeling enthusiastic you can assist them with their issue or clear you’’ re the very best individual for the task.
.
In 7 seconds or less, your homepage requires to respond to these 3 concerns:
# 1: What is it?
# 2: Why should I care?
# 3: What now?
Here’’ s the design template you ’ re going to utilize.
. The High-Converting Homepage Template.
These are the crucial homepage components you’’ ll requirement to develop your high-converting homepage:
. Leading Menu( logo design, standard navigation, main CTA) Headline/Sub-HeadlineHero Shot/Supporting ImageryCall-to-action (Primary/Secondary) How It Works (actions, features/benefits, video, demo/walkthrough, and so on) Who It’’ s For (avatars and utilize cases) Trust Builders( client logo designs, reviews, client stories, and so on) Footer (extended navigation, business information, legal notifications, various info).
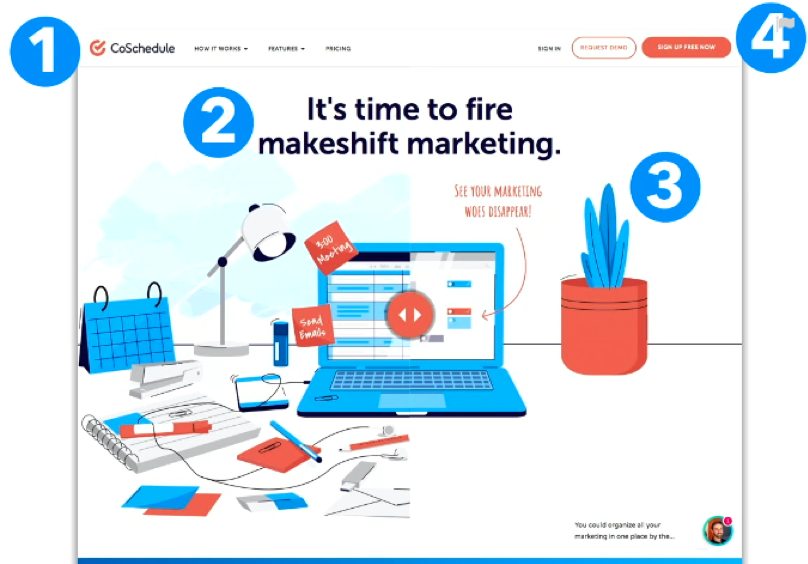
Using CoSchedule’’ s homepage as an example, you can see the very first 4 aspects identified listed below:
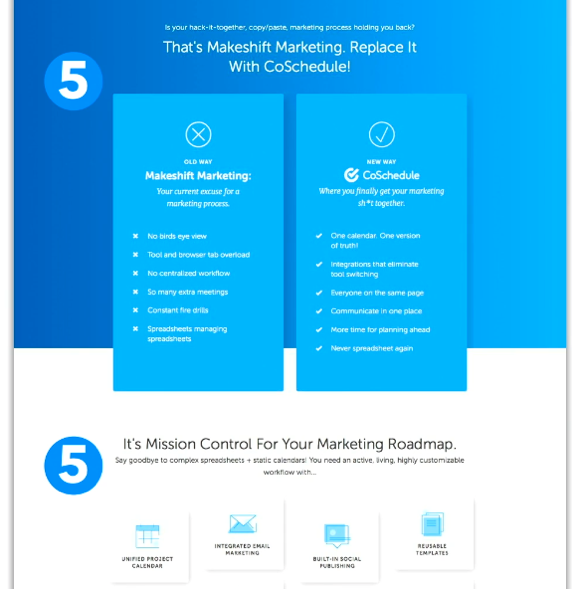
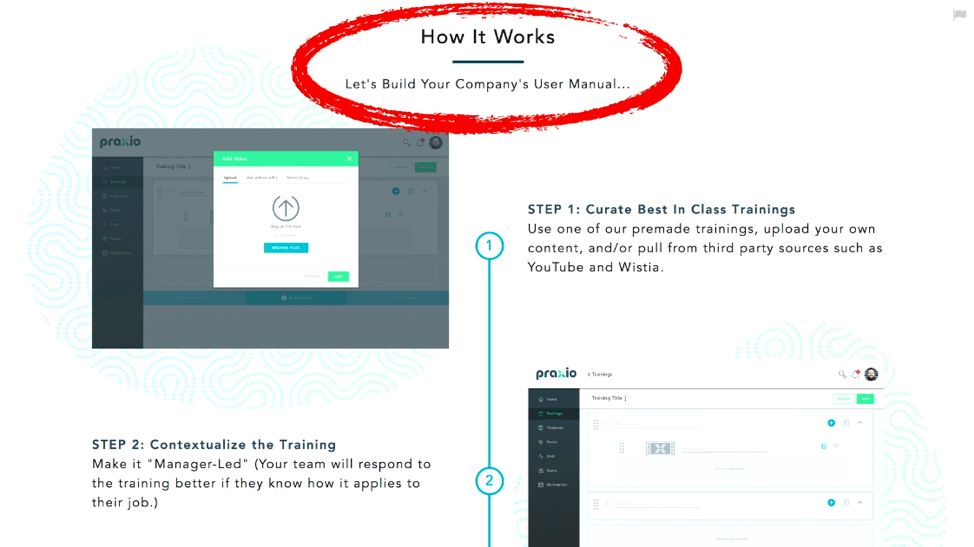
Here’’ s their How It Worksarea:
.
Here is their call out for their consumer avatar( Who It ’ s For):
.
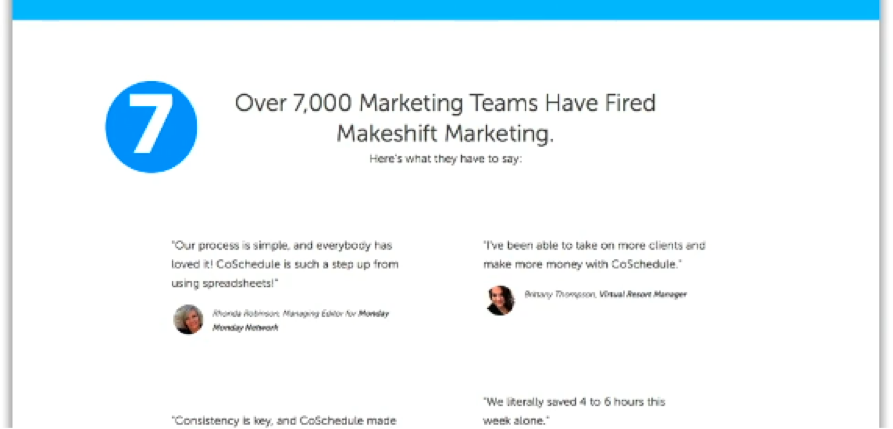
This is where they develop the trust we spoke about previously with reviews and social evidence (““ Over 7,000 Marketing Teams Have Fired Makeshift Marketing””-RRB-:
.
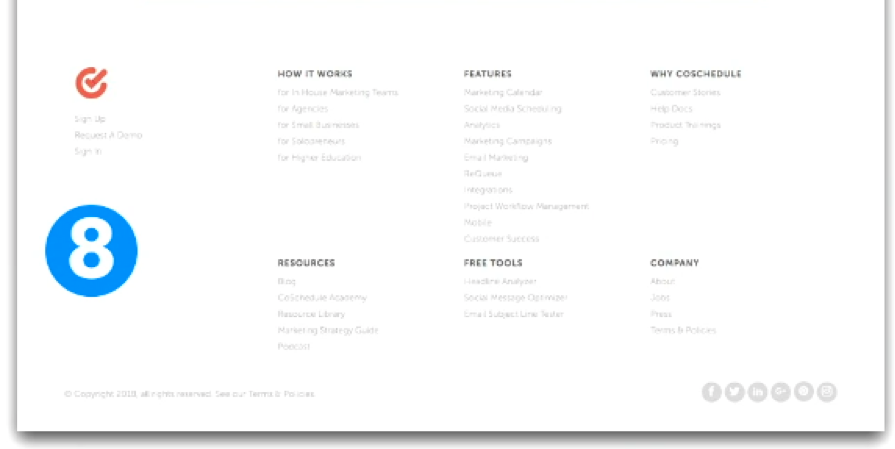
And finally, they have their footer:
.
Consider this your Pinterest inspo board for your homepage( you can likewise have a look at our homepage for more motivation).
.
Let ’ s take a dive into eachof these components so you understand you ’ re on the ideal track( we ’ re online marketers– we’live for performance).
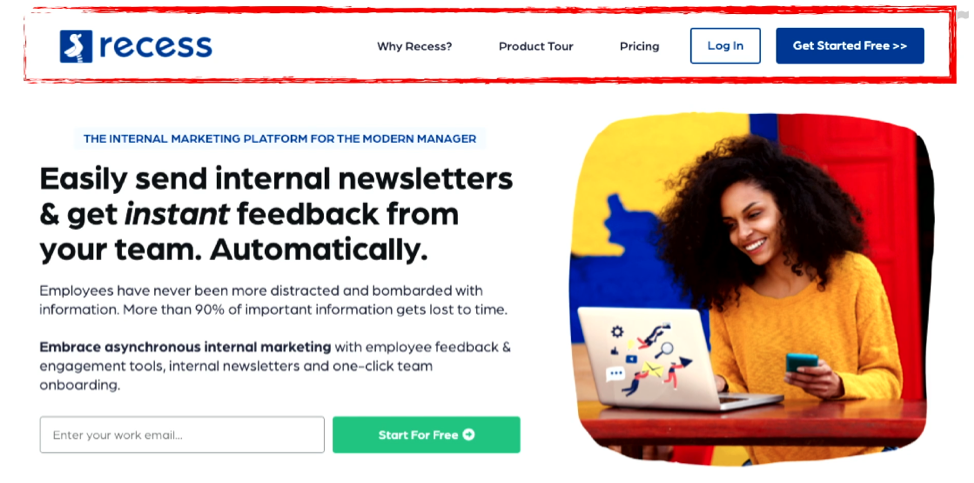
. # 1: Top Menu.
In the sensible words of Ryan, “ When it pertains to your menu, less is more. ” All you require are the bare fundamentals. You can include fall menus, however ensure they ’ re still minimalist and wear ’ t have a lot of choices.
. # 2: Headline/Sub-Headline.
The most difficult part of producing a homepage is your heading. It seems like the make or break and winds up getting more pressure than the supper inside your InstaPot. Utilize these design templates to discover the one that finest fits your avatar and deal and compose a subheadline that links the dots:
.Change Your [Existing Asset] Into [Understood Desired End Result] [Preferred End Result] for [Avatar] We Help You [Included Action] That [Accomplish Desired End Result] Get Help [Market/Company Type] Get More Out of [Understood Painful Action] Get More [Preferred Result] From Your [Existing Asset], Starting NowTurn [Something they have or something that’’ s simple to get] Into [Understood Desired End Result] Quickly [Outcome] with [Function] Make Your [Constituent Group] Better/Better At [Significant Core Skill/Benefit] [Accomplish Desired End result] without [Understood Roadblock or Bottleneck] Every can now [something basic] and [achieve preferred outcome] Stop [Understood Pain Point] We’’ ll Do It For You.Tired of [Understood Pain Point] [Item Name] Makes It Easy to [Get rid of Pain] # 3: Hero Shot/Supporting Imagery.
This is a huge one. Your hero shot is the main image on your page. The very best hero shot shows the after state your consumers experience thanks to your products/services. Prevent sidetracking, misaligned, or egotistical images (like a picture of your office complex).
# 4: Call-to-action (Primary/Secondary).
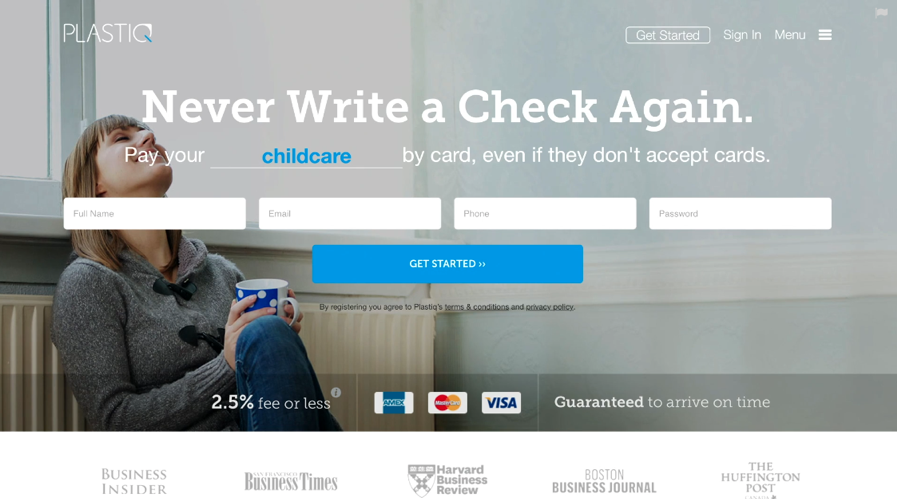
CTAs are everything about information. When somebody clicks on your button, clearness reveals self-confidence and makes it crystal clear what occurs. You desire someone to read your CTA and believe, ““ Got it, as soon as I click this [X] will occur.” ” Avoid CTAs like, ““ Get Started ” since your visitors can’’ t determine what occurs when they ‘‘ begin.’
. # 5: How It Works.
This is the next rational concern somebody asks after investing7 seconds on your homepage. They understand what it is, why they should care, and what to do now– however they ’ re questioning, how does this work? As appealing as it might be to’develop a creative heading, basic headings like “ How It Works ” responses the concern your visitor is asking. “
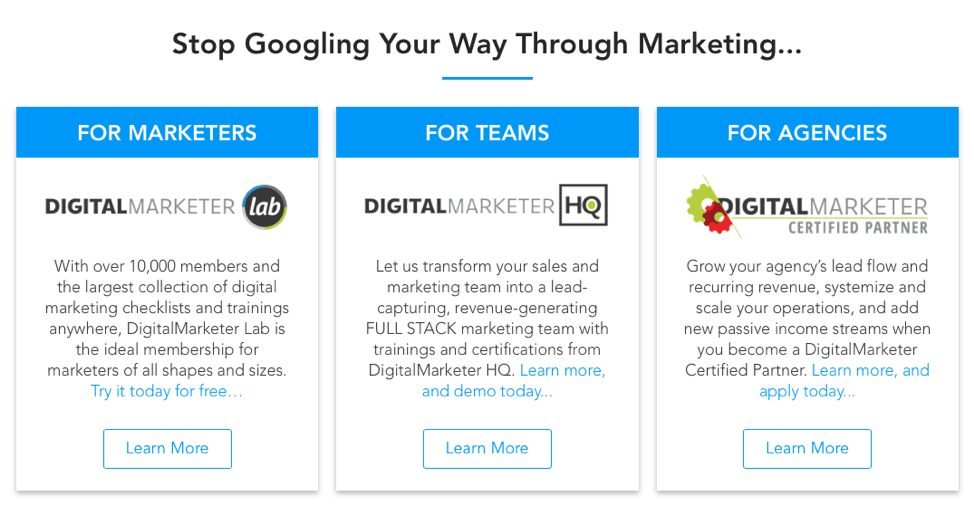
. # 6: Who It ’ s For.
This is the part of your homepage that keeps describing who your items are for. Your homepage has actually currently explained who your client avatar is, however this area can be utilized to broaden with more information. Here ’ s how the DigitalMarketer homepage information our 3 consumer avatars:
.’ # 7: Trust Builders. Due to the fact that ofthe Zero Moment minute Truth, #ppppp> Trust home builders are necessary for your homepageFact There are 4 classifications that rely on home builders fall under:
. Media mentionsTestimonialsCustomer StoriesIntegrations/Partners # 8: Footer.
We ’ re going to pretend to be thrilled about this part of homepages, however let ’ s be major. Your footer resembles the veggies you contribute to an unhealthy meal to pretend that you ’ re making a much better supper choice. Needed for your health, however not the most amazing part of your plate.
.
Here ’ s a resource list of whatever you desire on your footer:
. Copyright statementPhysical addressContact usTerms of ServicePrivacy PolicyExpanded navigationFlagship content/case studiesLinks to social residential or commercial properties.
You now understand how to compose not simply any homepage– however a high-converting homepage.
.
It ’ s so appealing to believe that we can create one gorgeous landing page and look’at it for the rest of our lives as it generates sale after sale. The truth is, your audience is more vibrant than that. They ’ ve been on the web for simply as long as you.
.
They ’ ve bought something just to discover’that it looks absolutely nothing like the item images. They’’ ve felt dissatisfied by copy that misinform the services they spent for.’It ’ s your homepages task to clarify that you understand what their issue is and how to repair it, and they can trust you to come through.
.
Start developing out your homepage and be among the couple of business that comprehend the value of the Zero Moment of Truth, and how to utilize it to get more conversions on your landing pages.





 Scalability.





 # 2: Headline/Sub-Headline.
 # 4: Call-to-action (Primary/Secondary).
 # 5: How It Works.
 # 6: Who It ’ s For.
 # 7: Trust Builders. Due to the fact that ofthe Zero Moment minute Truth, #ppppp> Trust home builders are necessary for your homepageFact There are 4 classifications that rely on home builders fall under: