
Disclosure: This material is reader-supported, which implies if you click a few of our links that we might make a commission.
Despite worldwide financial unpredictability, ecommerce continues to grow and grow at a stable rate. More individuals are going shopping online than ever previously.
Want to participate the action?
Creating an ecommerce site or online shop is not that difficult. You wear’’ t need to understand any technical or programs understanding to start.
Finding success will require time and effort, no doubt. The most essential lessons you find out about running an online shop come after you release. You actually can’’ t get the experience anyother method.
.
Read on as I teach you how to get your ecommerce site up and running in no time.
. Your 2-Minute Cheat Sheet.
I’’ ll reveal you how you can develop an ecommerce site utilizing Shopify.
.
Shopify is king in the ecommerce area, which is likewise why it ranks so high up on our list of the finest ecommerce site home builders .
What works for me is the platform’’ s flexibility.
Whether you intend on releasing a brand-new ecommerce company from scratch or scaling it, Shopify has whatever you might potentially require. Plus, there’’ s the alternative to do a 14-day totally free trial!
. 
Users can make the most of industry-specific design templates, customized domains, drag-and-drop shop contractor, limitless items, integrated payment processing, and 24/7 assistance.
Precisely why it’’ s among the very best.
.
After registering, you need to establish your online shop. You can tailor it by selecting a style or design that works finest for you.
Next, begin noting items on your site. This is likewise where you ought to focus on the item copy (hi SEO !).
Upload HD quality images with your items on a white background. Ensure your images have the very same measurements—– it simply makes whatever look neater.
Choose your payment entrance, which is a function that permits your clients to pay through your site.
You need to think about the deal charges, card types, and offsite checkout to understand the quantity of cash you’’ ll get after deducting all appropriate charges.
Get your online store live by completing details associated to tax and shipping. Provide your order system a test drive to make sure whatever is on track.
Lastly, you require a domain. You can either purchase one from Shopify itself or choose a 3rd party—– the option is yours.
And that’’ s it! Your brand-new Shopify shop is now prepared to generate the moolah.
.
Without more ado, let’’ s begin with the in-depth tutorial! Do not hesitate to leap ahead if you’’ ve currently looked after the early actions:
Create Your Shopify Account Set up Your Shopify Online Store Choose a Theme or a Layout For Your Store Customize Your Store Settings List Products on Your Ecommerce Website Make Your Shopify Store Live Get a Domain Name Step 1: Create Your Shopify Account.
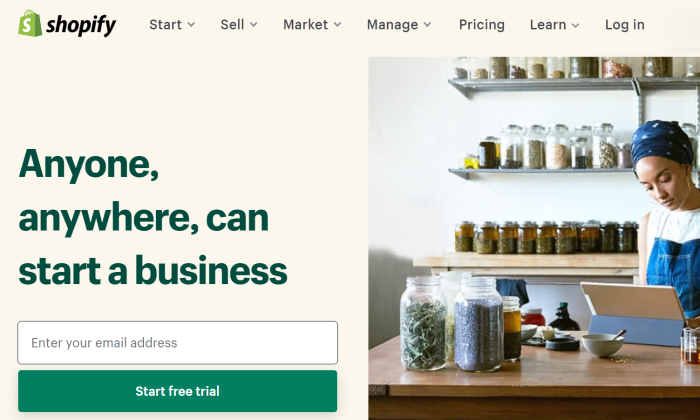
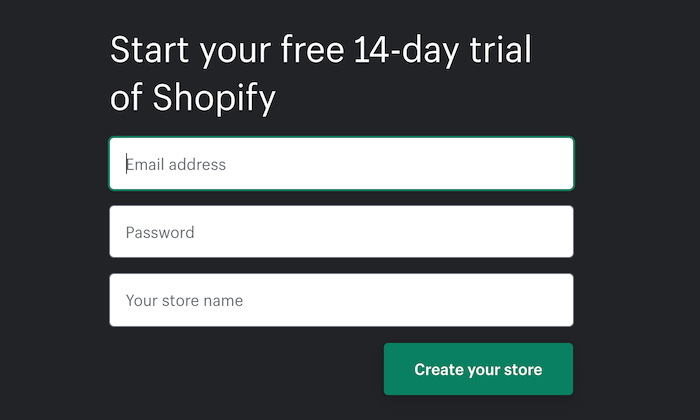
Head over to Shopify.com , and utilize the signup type to produce your account. You can begin your 14-day complimentary trial after filling out all the essential information.
You need to attempt to pick a distinct shop name. This shouldn’’ t be at the expense of simpleness or significance.
In case you key in a currently picked shop name, Shopify will ask you to return to something else. As soon as you get the site name arranged, you’’ ll need to complete a couple of other information, such as your name, nation, address, and contact number.
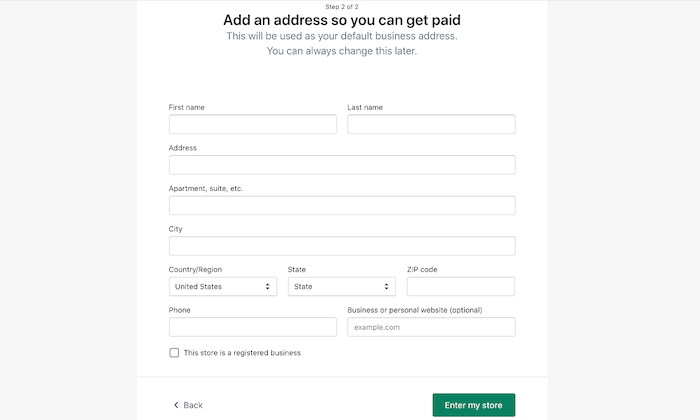
After this preliminary screening, you need to address whether you own items, and if you do, what you intend to offer.
In case you’’ re simply trying Shopify, you can choose choices like ‘‘ I ’ m simply messing around’ ’ in the Do you have items? dropdown menu and ‘‘ I ’ m still conceptualizing concepts ’ in the What will you offer? area.
Once you’’ re done, click I ’ m done.
.Action 2: Set up Your Shopify Online Store.
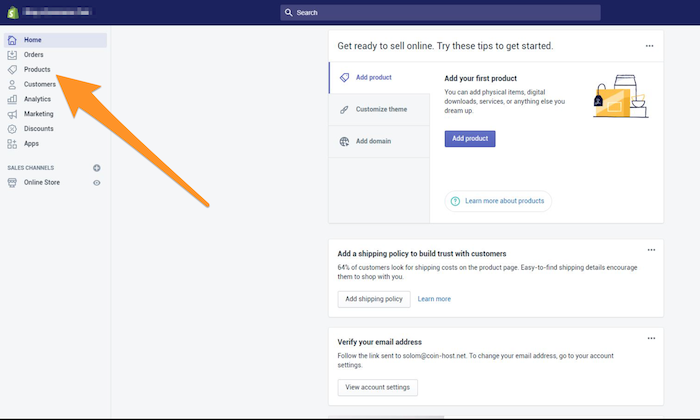
Once you’’ ve made your account on Shopify, you‘‘ ll be directed instantly to your shop admin screen or control panel. Your house admin screen will inform you whatever you ought to understand to get your website up and running.
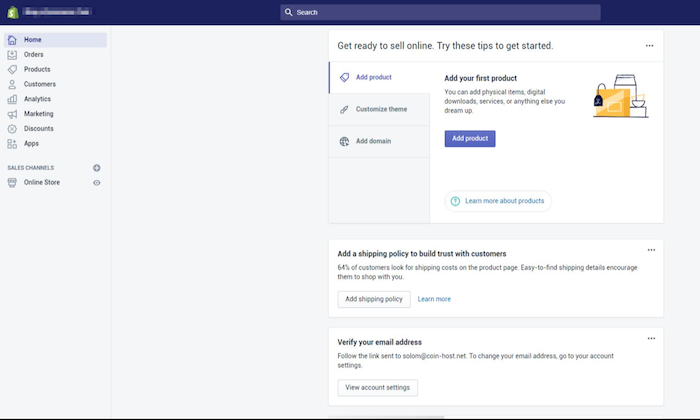
At this point, you can begin tailoring your shop, submitting items, and establishing payments and shipping. You’’ ll likewise discover numerous other choices on the side menu bar, however at this minute, it’’ s best to stay with the essentials.
.Action 3: Choose a Theme or a Layout For Your Store.
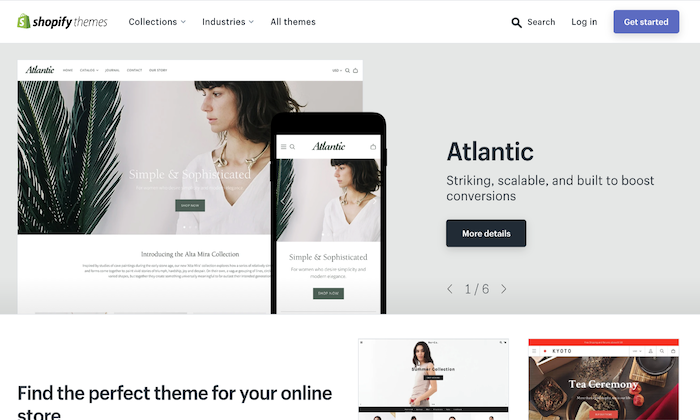
Shopify provides you direct access to a variety of styles thanks to its all main style shop . Every one of them is ensured to have complete assistance from the designers. You can rest simple understanding that your shop is constantly going to be in excellent hands.
The concept behind selecting a style is to produce a more on-brand site that looks excellent. This will keep your visitors on your site for longer and take a look at your items.
Each one of the styles has a thorough list of adjustments. You wear’’ t require any previous coding understanding.
If the complimentary styles wear’’ t attract you, you can constantly pick the premium variations that include more functions and personalization alternatives. Truthfully, this likewise looks far better when compared to a complimentary one—– offered you pick the right alternative.
Another reason I like Shopify a lot is that it’’ s exceptionally easy to use. Even if you choose to make significant modifications to a style, the restrictions are couple of.
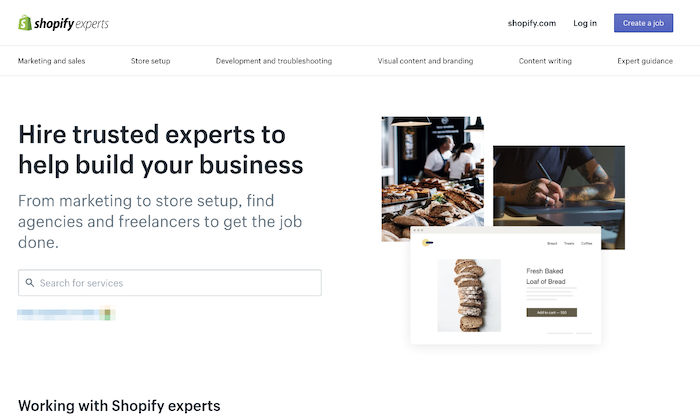
You wear’’ t need to stress over not having any coding experience. Shopify has a worldwide group of style companies—– called Shopify Experts —– that can completely tailor your ecommerce site. You’’ ll have to pay for this professional service.
Here are a couple of fast pointers to assist you discover the ideal Shopify style:
.# 1 Go Through the entire Theme Store.
Once you check out the URL, be prepared to be stunned.
You overcome 70 style variations—– out of which there are many fantastic complimentary ones, too—– that you can utilize for your Shopify shop. Aside from this, you can likewise discover Shopify styles on other markets like TemplateMonster .
Try to select a style that matches your brand name and, naturally, fulfills your individual choice.
You likewise have the choice to filter the styles by paid or complimentary, functions, and market. If you wish to be much more selective, you can include filters for rate, appeal, and latest.
.# 2 Check Out the Theme’’ s Reviews.
After you pick a style you like, click its sample image. You’’ ll discover more info about the style, like whether it’’ s mobile-friendly, responsive, to name a few functions.
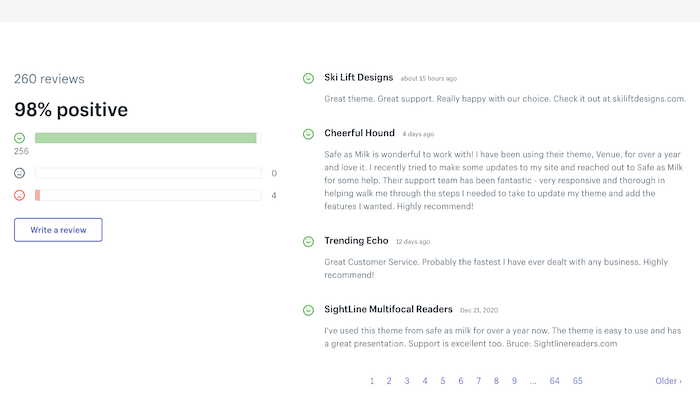
Scroll to check out evaluations composed by individuals who formerly utilized the style to discover more about their experiences.
.# 3 Preview the Theme.
Shopify offers you the choice to see your picked style live. Click View Demo situated listed below the green ‘‘ Preview Theme in your Store’ ’ button.
.
The sneak peek function is a fantastic choice for styles that have a series of designs. In its lack, you would discover yourself duplicating the entire choice procedure once again and once again till you’’d discover the ideal match. Yikes.
.# 4 Get the Shopify Theme.
If you like the demonstration variation of a particular style, all that’’ s left for you to do is click the green button to get it.
.
When Shopify asks you to offer your verification about setting up the style, click Publish as my Shop’’ s Theme. And if you ’ re still unpredictable about your selected style, you can constantly alter it later on.
Shopify will inform you when your style completes setting up and after that provide you the alternative to Go to your Theme Manager.
This supervisor includes all your released styles (the one you’’ ve set up or triggered most just recently), together with unpublished styles (formerly set up styles).
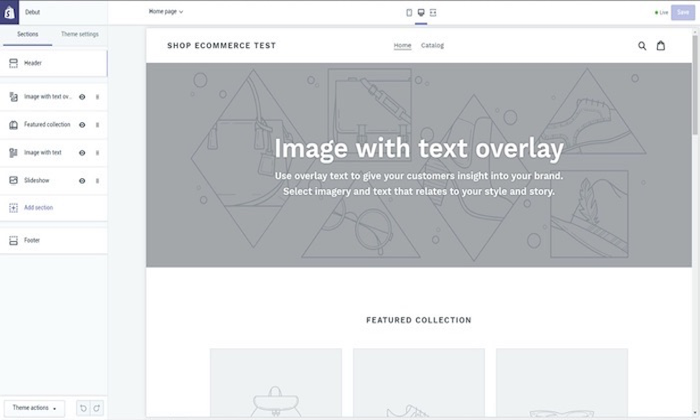
.Step 4: Customize Your Store Settings.
Shopify styles resemble your individual fairy godmother.
They totally change the method your ecommerce site looks, offering it a distinct look even when countless other users download the extremely exact same style.
How is this possible?
You can make basic modifications by modifying your settings.
Select Themes from the left navigation menu. You’’ ll see your live style in a box at the really leading.
.
This box will consist of 2 buttons situated in the leading right corner of package. The very first one with 3 dots enables you to make standard settings modifications.
One of them will permit you to replicate your style. I encourage you to do this as a backup. If you put on’’ t like the modifications you make, you can constantly erase them and begin working once again from the replicate.
The 2nd button is ‘‘ Customize Theme.’ ’ Clicking on it will direct you to a page that manages all the standard performance of your shop. This is where you can make huge modifications and test out all functions to comprehend what your site is genuinely efficient in.
Other choices let you rearrange aspects on pages, consisting of revealing item images left wing, right, or center of the page. You can likewise pick whether you’’d like to show social networks icons, such as like, +1, pin, or tweet.
.Step 5: List Products on Your Ecommerce Website.
Click on Products on the left side menu on your admin screen.
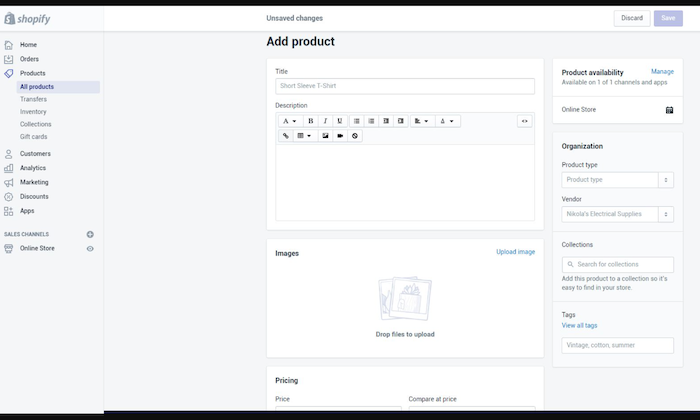
You’’ ll see a blue Add Product button in the middle of the page. Click it. This will enable you to include as much information as you desire about your items.
Pay attention to items that might do with some SEO optimization, including their description, name, and url. Attempt to include as numerous information as you can to offer your client a clear concept about your items.
This is likewise the screen where you publish HD-quality pictures of your items—– ideally on a white background. As soon as your images are submitted, you can reorganize them nevertheless you like, so there’’ s no trouble of needing to publish them in a particular order.
I actually can not highlight enough the power of item images.
Product images contribute in making a sale. This is why you must make a point to include just the very best images that highlight distinct or unique functions in the close-up pictures of the products.
Another pointer would be to make sure all images have the exact same measurements.
This will offer your site an extremely neat look. If you desire to make your pages look comparable to a Pinterest board, you can do that too.
Finally, click Save Product situated at the bottom and leading best corners to conserve all your modifications.
That’’ s not all.
.
When including images, you ought to develop collections to lure your visitor by offering a number of comparable choices on the very same page, enhancing your possibilities of making a sale.
Option A: Set up Collections of Groups of Products
A collection of a group of items consists of products that have a couple of functions in typical. Here are a couple of collection concepts that you can think about:
.Products on saleItems in particular colors and sizesItems separated based upon gender and age, like guys, childrenitems, or females coming from the exact same item classification, like fans, battery chargers, precious jewelry, and so on.
The fascinating thing here is that a single product can appear in any variety of collections. A size medium white t-shirt will be noted under at least 3 collections: White Color, Women/Men, and Size Medium. You can note your collection names on the homepage in the navigation bar.
Your clients will thank you as they won’’ t need to go through your entire brochure simply to discover a particular product.
Option 2: Manual and Automatic Collections
When you include a brand-new collection, you can pick how to include the items. Presently, there are 2 methods of doing this:
.By hand –– You separately include and get rid of items in the collection.Automatically –– You established particular choice conditions that will immediately include items that satisfy the requirements.
While you are at it, select a payment entrance, too. This is a function that allows your consumers to spend for items straight through your site.
Not all payment entrances are produced equivalent.
Make sure you go through the deal charges, card types, and offsite checkout to pick a choice that you discover most proper.
.Action 6: Make Your Shopify Store Live.
Before your website goes live, you require to include a couple of more information about your business and how you will provide the products and pay taxes.
Tick the checkboxes versus Charge taxes and Requires shipping any place appropriate. You’’ ll discover these alternatives under the Variants area of the Products page after you click the name of a provided item.
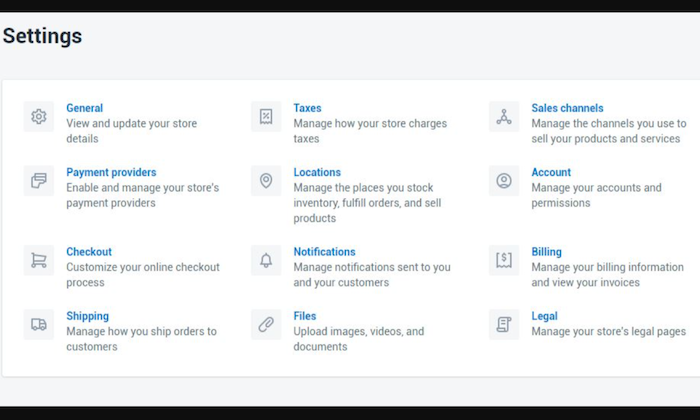
Go to Settings to submit this info. I’’d suggest utilizing the Google Analytics function to keep an eye on your shop visitors, too.
.Do a Test Transaction.
This is the supreme test to see whether your shop is on track and get a concept of what your clients will experience when they put an order from your Shopify shop.
You can utilize Shopify’’ s Bogus Gateway for this.
. Select Settings from your shop Admin, followed by Payments.If you have the charge card payment entrance made it possible for, deactivate it. Click Edit, and after that verify your deactivation after choosing Deactivate.Under the Accept charge card area, pick to Select a Credit Card Gateway. This will open a drop-down menu.Scroll to Other, and after that choose Bogus Gateway.Choose Activate—– or Reactivate if you’’ ve utilized Bogus Gateway before.Return to your shop, and put an order as a client generally would. At checkout, go into the fake charge card information rather of authentic numbers.
If you choose putting an authentic deal, you can do that, too. Simply keep in mind to cancel the order instantly to reimburse yourself and prevent paying deal charges.
.Action 7: Get a Domain Name.
You require a domain to make your website live. I‘‘ ll inform you 2 methods you can do this:
. You can purchase a domain from Shopify, which will be included to your shop instantly. This is excellent and time-saving for individuals who put on’’ t understand much about webhosting. This expenses in between $9 and $15 every year. Second, you can purchase a domain from a third-party like GoDaddy. These domains begin with $10 each year. Keep in mind, you’’ ll need to reroute the DNS records yourself in this case. If you put on’’ t wish to’do that, it ’ s much better to purchase a domain from Shopify itself.
If you do wish to put your Shopify shop reside on a third-party domain, follow the listed below actions:
# 1 Add the brand-new domain in Shopify.
On the left navigation menu in the Admin page, go to Settings and after that Domains. Include your domain after clicking the ‘‘ Add a current domain’ ’ button.
.
# 2 Update your DNS records.
Log into your domain registrar (example: GoDaddy) to make the following modifications:
Replace the @ or primary A record with the following IP address: 23.227.38.32
Replace the www or include CNAME with yourstorename.myshopify.com.
# 3 Remove any shop passwords.
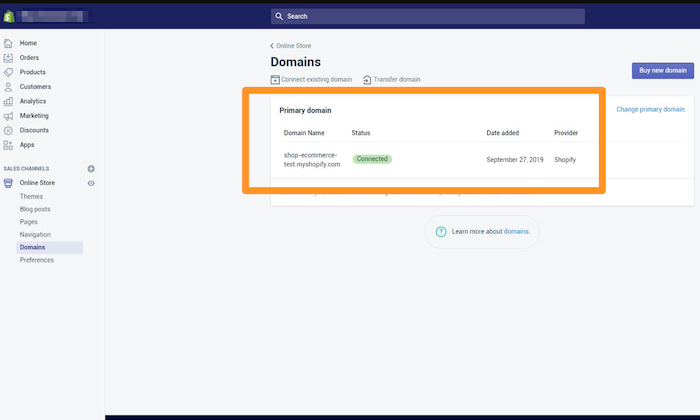
# 4 Set your Shopify shop as the main.
Go to your online shop, and click Domains. Pick your primary domain by utilizing the dropdown button. Examine the Redirect all traffic to this domain. This will direct all your traffic from other domains to your main domain.
# 5 Add other domains.
Repeat the very first 2 actions with any other domain you utilize. All traffic from these domains will be rerouted to the main domain, which you embed in action 4.
.Conclusion.
Congratulations! Your brand-new Shopify ecommerce shop is now up and running. You’’ re now entirely prepared to get a taste of being an ecommerce seller.
The good idea about Shopify is you can tailor your shop to your preference as lot of times as required to keep whatever practical and practical for you.
Keep exploring as you go, and you’’ ll discover your success mantra.
Which ecommerce site contractor do you choose? Is it Shopify or others like Wix, WooCommerce, or something else? Let me understand in the remarks listed below.
Read more: feedproxy.google.com